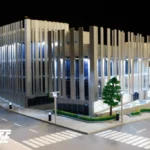
مروری گامبهگام بر ساخت ماکت تیپ ساختمان شهرک وطن تاجیکستان
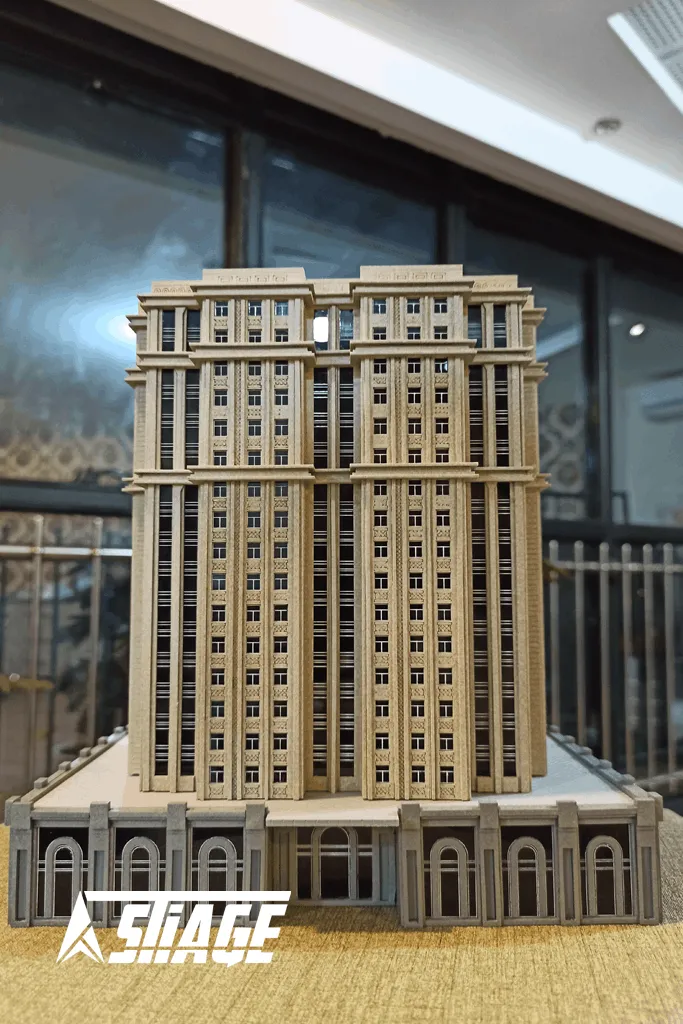
ساخت ماکتهای معماری، راهی مؤثر برای نمایش سهبعدی ایدههای طراحی و تجسم طرحها بهصورت ملموس است. این مقاله به بررسی مراحل آمادهسازی و ساخت یک ماکت تیپ ساختمان شهرک وطن در کشور تاجیکستان میپردازد؛ ماکتی که با مقیاس ۱:۴۰۰، متریال پلکسی گلس، رنگ رزینی سبک و سبک رنگآمیزی رئال همراه با شبیهسازی بافت متریال طراحی و اجرا شده است.
۱. تحلیل نقشههای معماری
نخستین گام، بررسی و سادهسازی نقشههای پلان، نما و برش ساختمان است. در مقیاس ۱:۴۰۰، لازم است که جزئیات پیچیده حذف و تنها عناصر اصلی و شاخص حفظ شوند تا ماکت هم خوانا باشد و هم ساختپذیر.
۲. مقیاسگذاری و طراحی نقشه پایه
پس از سادهسازی، نقشهها به مقیاس ۱:۴۰۰ تبدیل شده و بهصورت دقیق روی کاغذ یا نرمافزار طراحی ترسیم میشوند. این نقشه بهعنوان لایه مرجع برای برش قطعات و چینش نهایی مورد استفاده قرار میگیرد.
۳. برش دقیق متریال
قطعات سازهای مانند دیوارها، کف، پنجرهها و سقف از ورقهای پلکسی گلس بریده میشوند. این کار با استفاده از دستگاه لیزر یا CNC انجام میشود تا لبهها صاف، دقیق و تمیز باشند.
۴. مونتاژ لایهبهلایه
قطعات با چسبهای مخصوص آکریلیک بهصورت مرحلهبهمرحله از پایین به بالا روی هم سوار میشوند. دقت در همراستایی لبهها و حجمسازی صحیح از اهمیت زیادی برخوردار است.
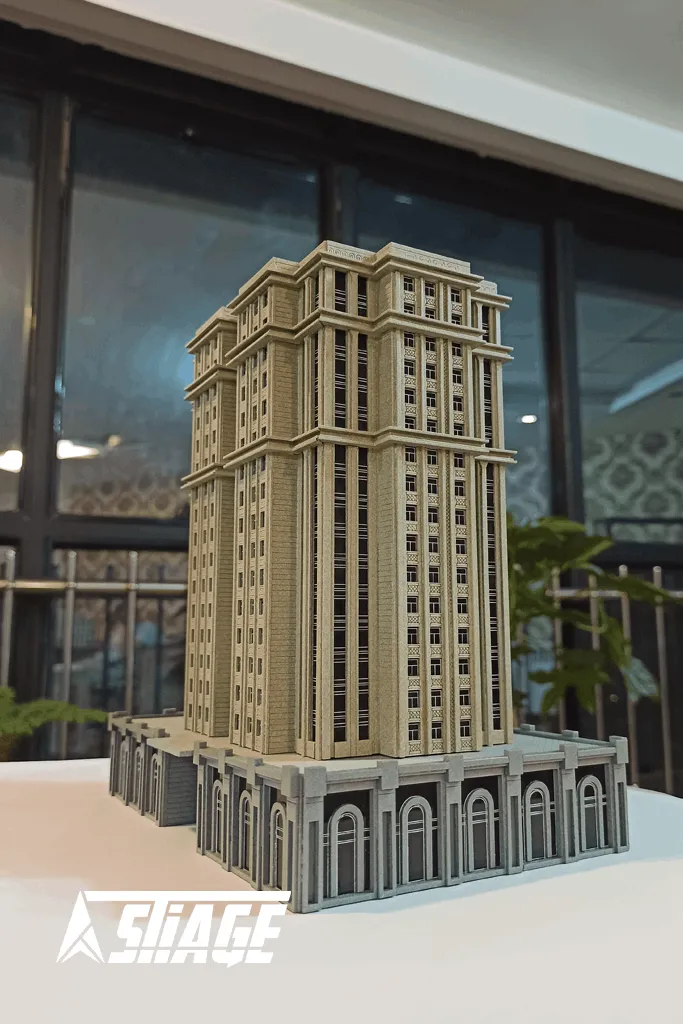
۵. رنگآمیزی بافتدار و واقعگرایانه
پس از تکمیل سازه، سطح قطعات برای رنگآمیزی آمادهسازی میشود. از رنگهای رزینی سبک استفاده میشود تا بافتهایی شبیه به متریالهای واقعی (مثل بتن، آجر یا سنگ) روی ماکت ایجاد شود. برای این کار از قلمموهای ظریف یا دستگاه ایربراش استفاده میشود.
۶. جزییات نهایی و افکتهای بصری
برای ایجاد حس واقعگرایانهتر، جزئیاتی مانند بافت متریال، خطوط درزها و تنوع رنگی نماها بهصورت دستی اجرا میشود. در صورت نیاز، افکتهایی مانند کهنگی یا سایهروشن نیز اضافه میشود.
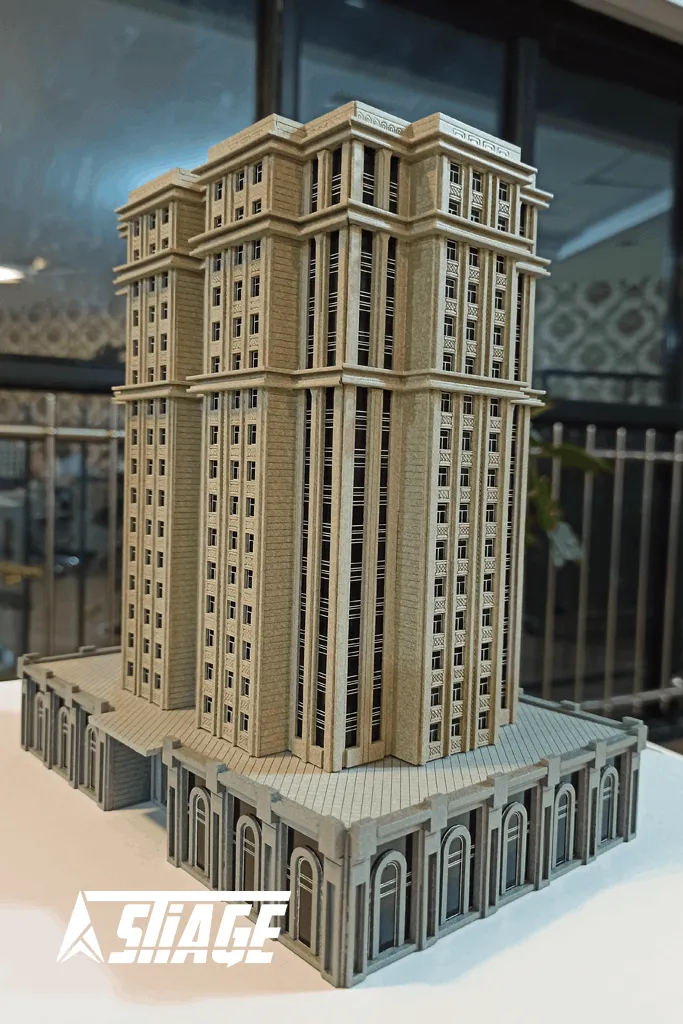
۷. نصب روی پایه و آمادهسازی برای ارائه
ماکت نهایی روی پایهای از جنس MDF یا آکریلیک نصب شده و آماده ارائه در نمایشگاهها، جلسات بررسی طراحی یا معرفی به کارفرما خواهد بود. میتوان توضیحات یا پلاک مشخصات پروژه را نیز به پایه اضافه کرد.
این ماکت، نمایی حرفهای و فیزیکی از طرح تیپ شهرک وطن ارائه میدهد و میتواند نقش مهمی در فرآیند ارائه و تصمیمگیریهای معماری و شهرسازی ایفا کند.
Model of the Standard Building in Vatan Residential Complex, Tajikistan
Scale : 1/400
Client : –
Material : Plexiglass
Painting : Light resin paint
Painting Style : Realistic
Category: Architectural Model
Step-by-Step Overview of the Construction of the City of Vatan Residential Complex Model in Tajikistan Architectural models are an effective way to display design ideas in three dimensions and to visualize plans tangibly. This article examines the steps in preparing and constructing a model of a typical building in the Vatan residential complex in Tajikistan; a model that is made with a scale of 1:400, using plexiglass material, light resin paint, and a realistic painting style with material texture simulation.
Analyzing Architectural Plans The first step is to review and simplify the floor plans, elevations, and sections of the building. At a scale of 1:400, it is necessary to remove complex details and retain only the main and essential elements to make the model both legible and buildable.
Scaling and Designing the Base Plan After simplifying the plans, they are scaled to 1:400 and carefully drawn on paper or using design software. This plan serves as a reference layer for cutting the pieces and arranging them in the final layout.
Precise Material Cutting Structural components such as walls, floors, windows, and roofs are cut from sheets of plexiglass. This is done using laser or CNC machines to ensure that the edges are smooth, precise, and clean.
Layer-by-Layer Assembly The pieces are assembled step-by-step from bottom to top using acrylic-specific adhesives. Accuracy in aligning the edges and proper volume construction is critical in this stage.
Textured and Realistic Painting Once the structure is complete, the surface of the parts is prepared for painting. Light resin paints are used to create textures similar to real materials (such as concrete, brick, or stone) on the model. Fine brushes or an airbrush machine are used for this task.
Final Details and Visual Effects To enhance the realism, details such as material textures, joint lines, and variations in the color of the facades are manually applied. If necessary, effects like aging or shading can also be added.
Mounting on a Base and Preparing for Presentation The final model is mounted on a base made of MDF or acrylic and is ready for display at exhibitions, design review meetings, or presentation to the client. Project descriptions or specification plaques can also be added to the base.
This model provides a professional and physical representation of the Vatan residential complex design and can play an important role in the presentation process and decision-making in architecture and urban planning.


")


