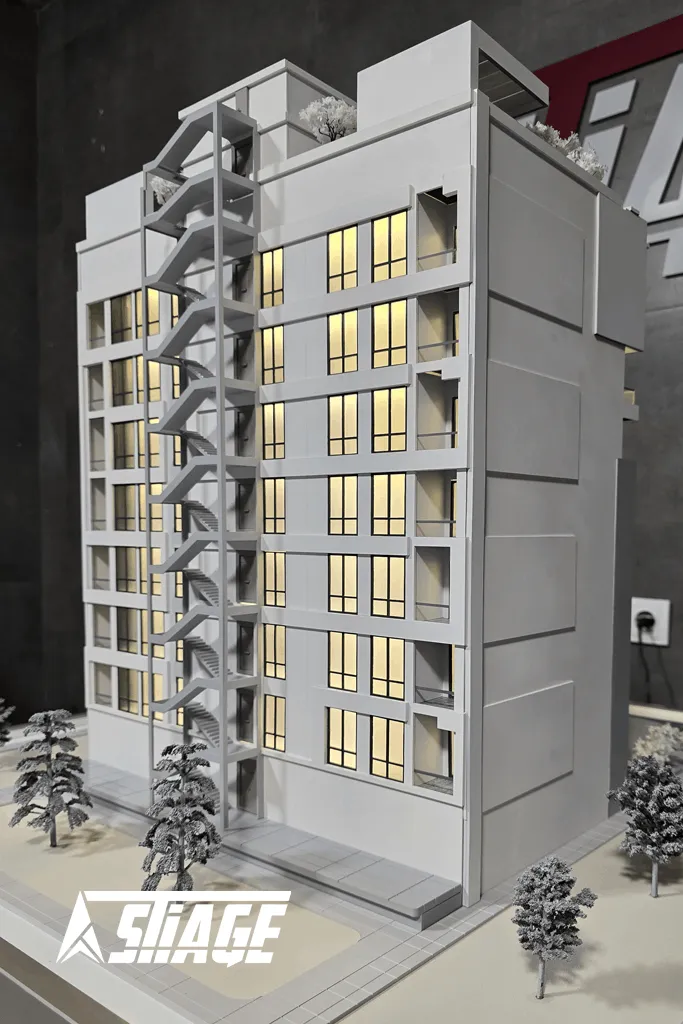
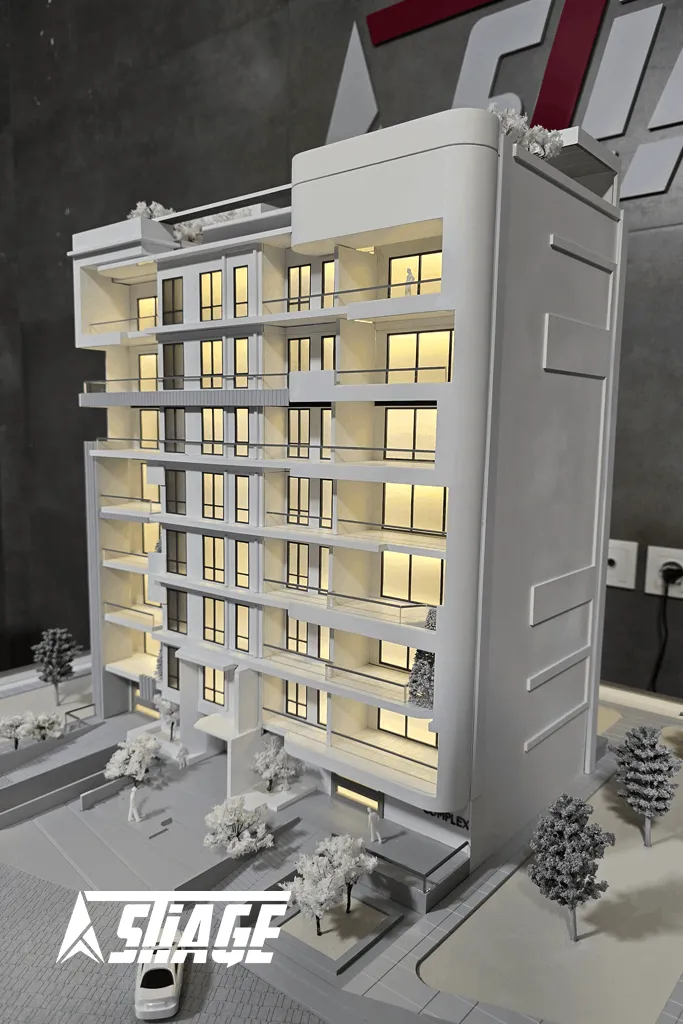
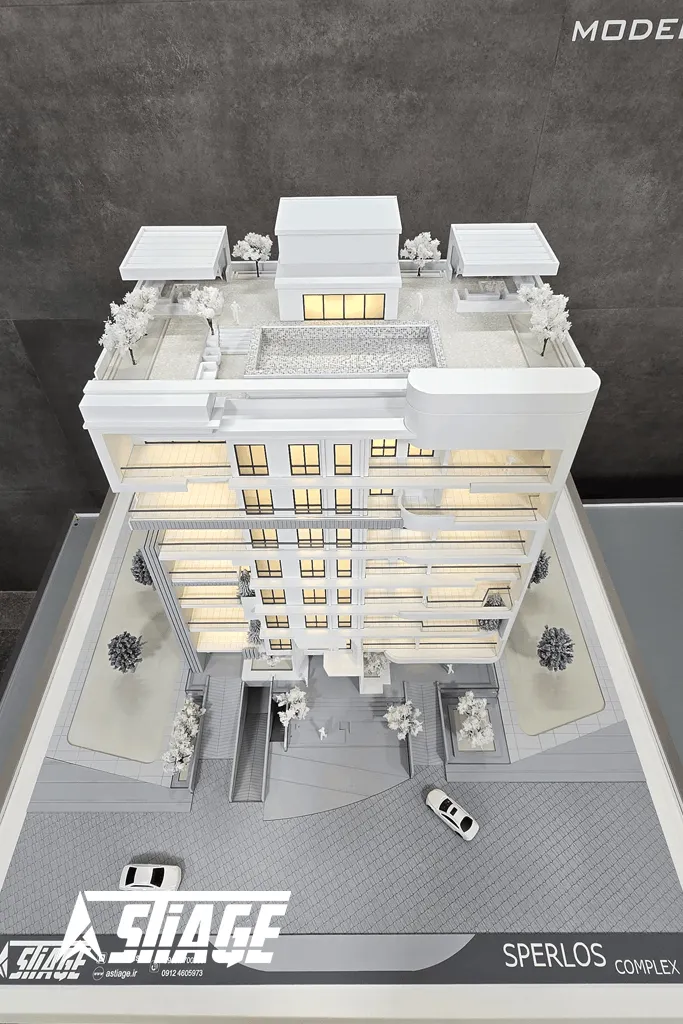
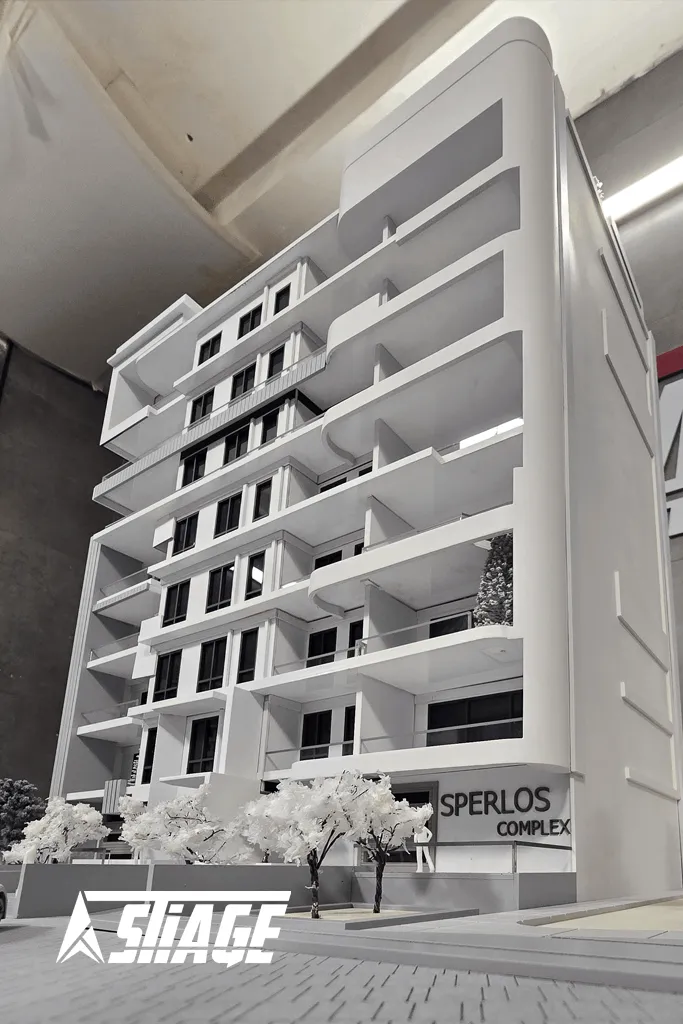
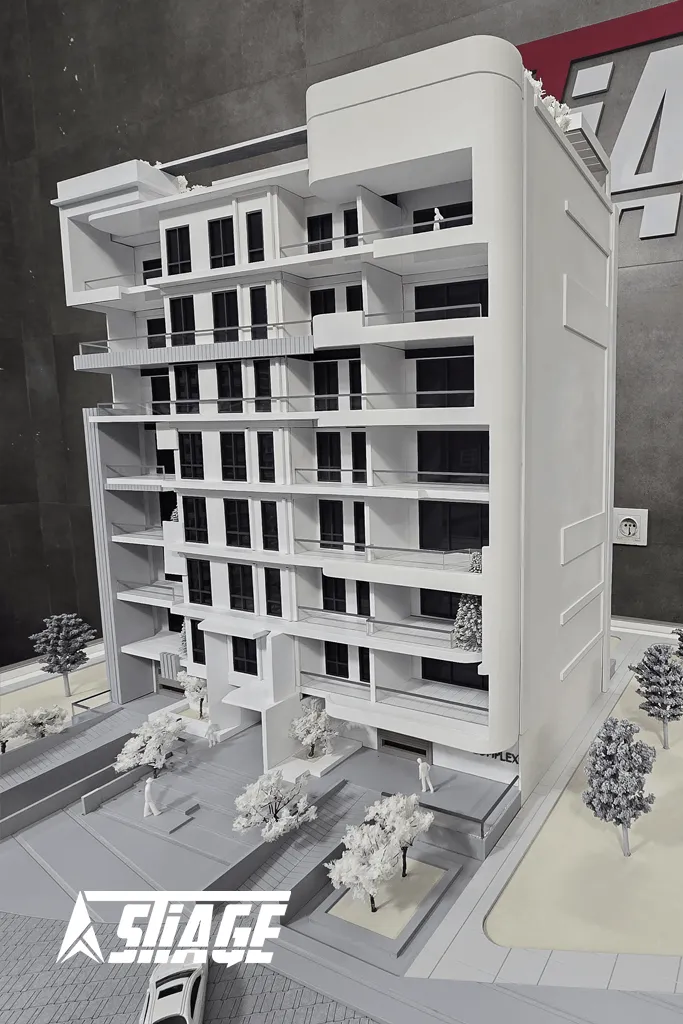
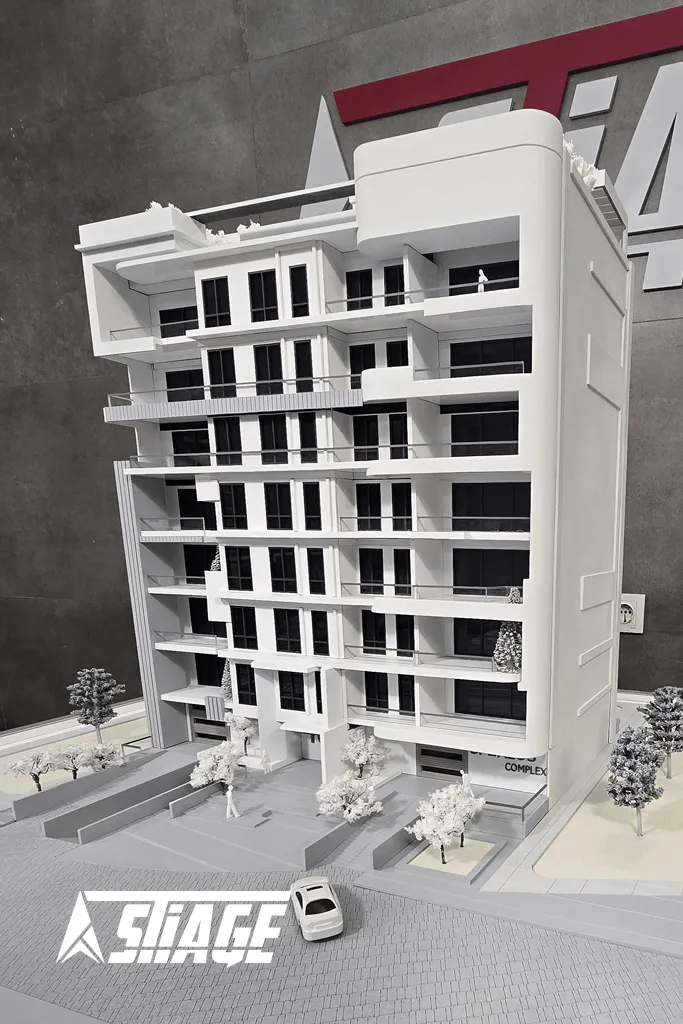
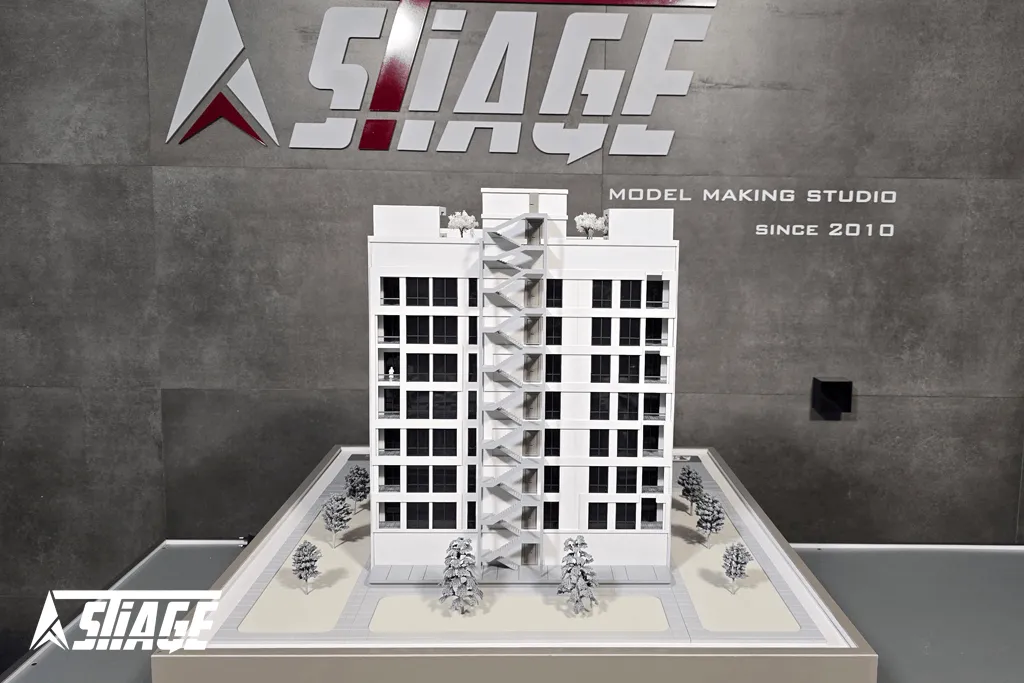
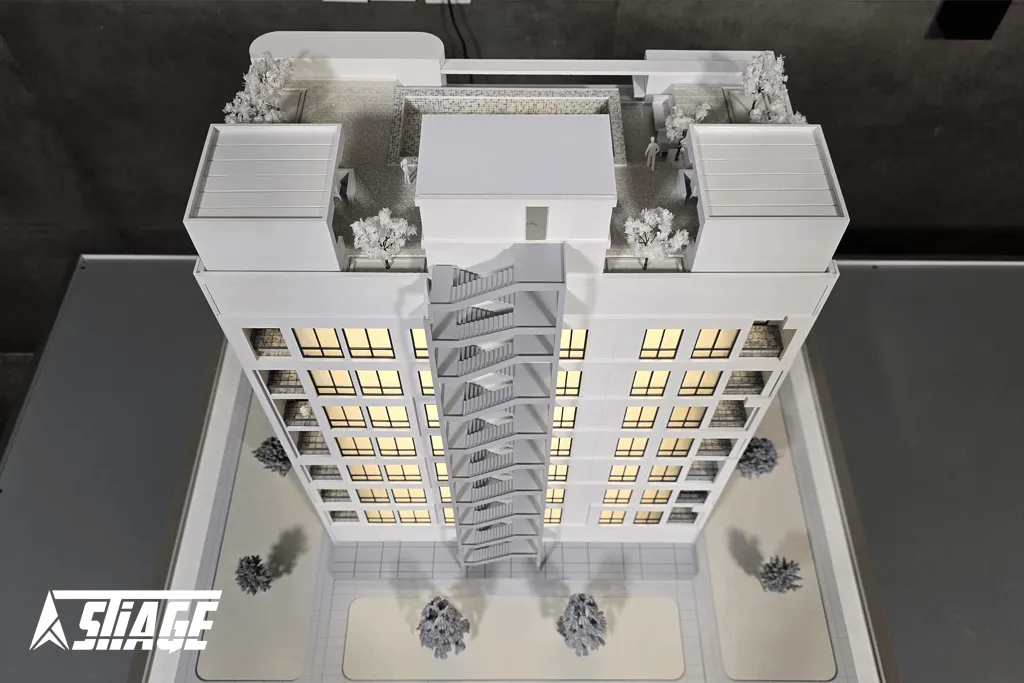
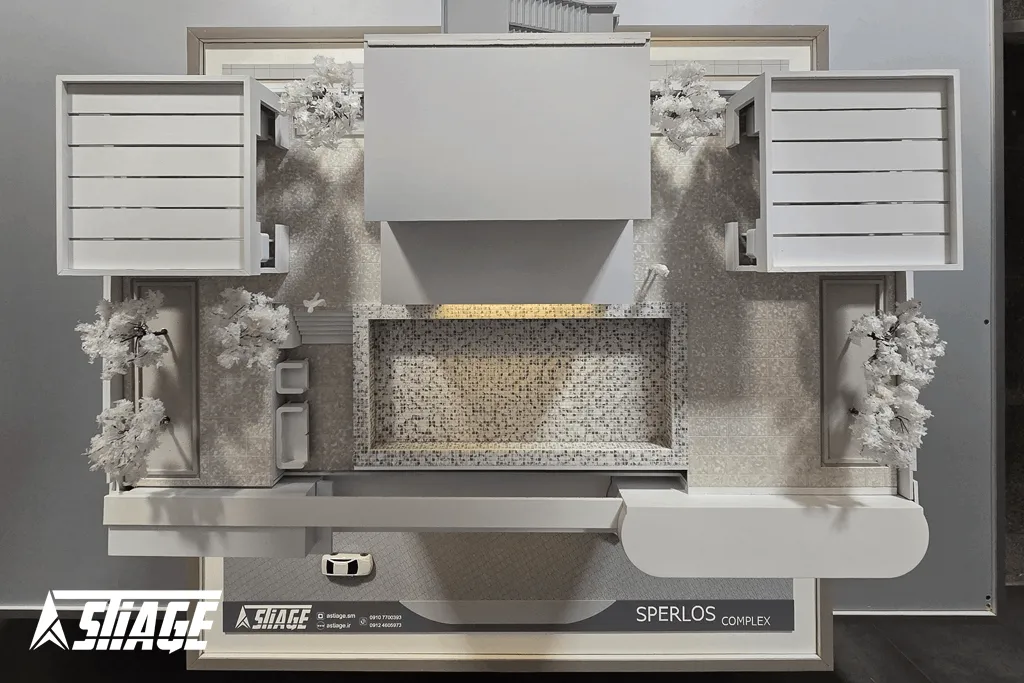
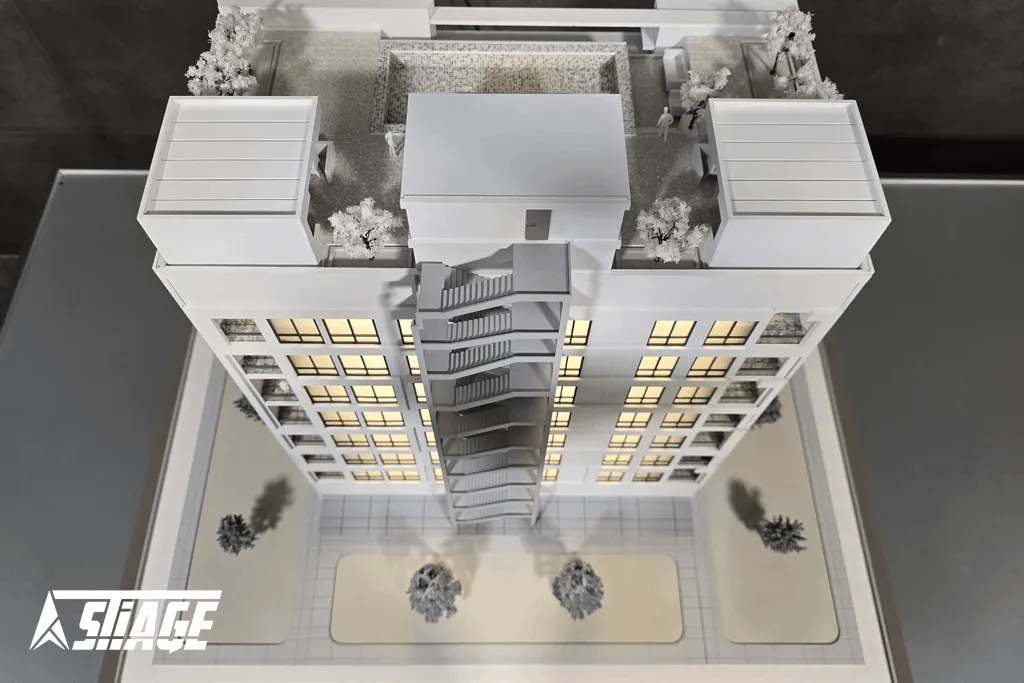
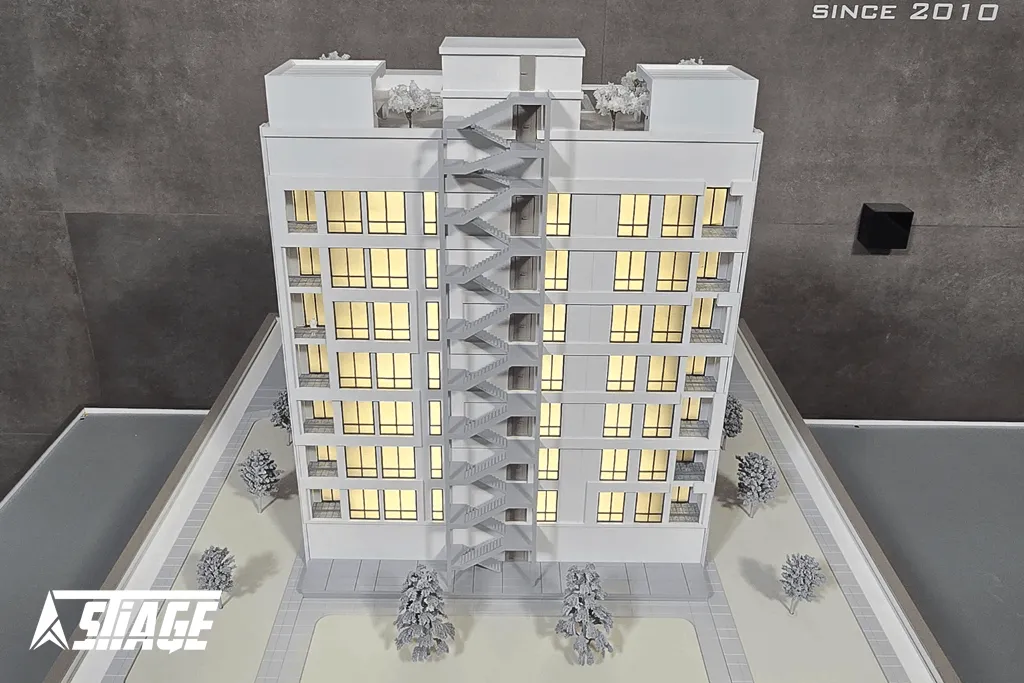
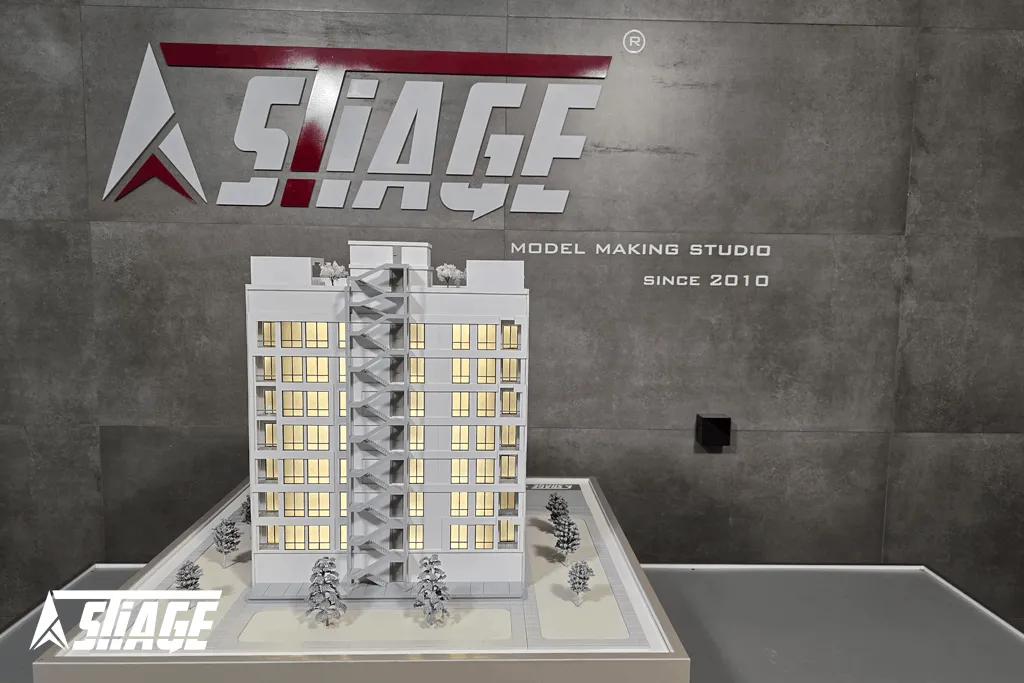
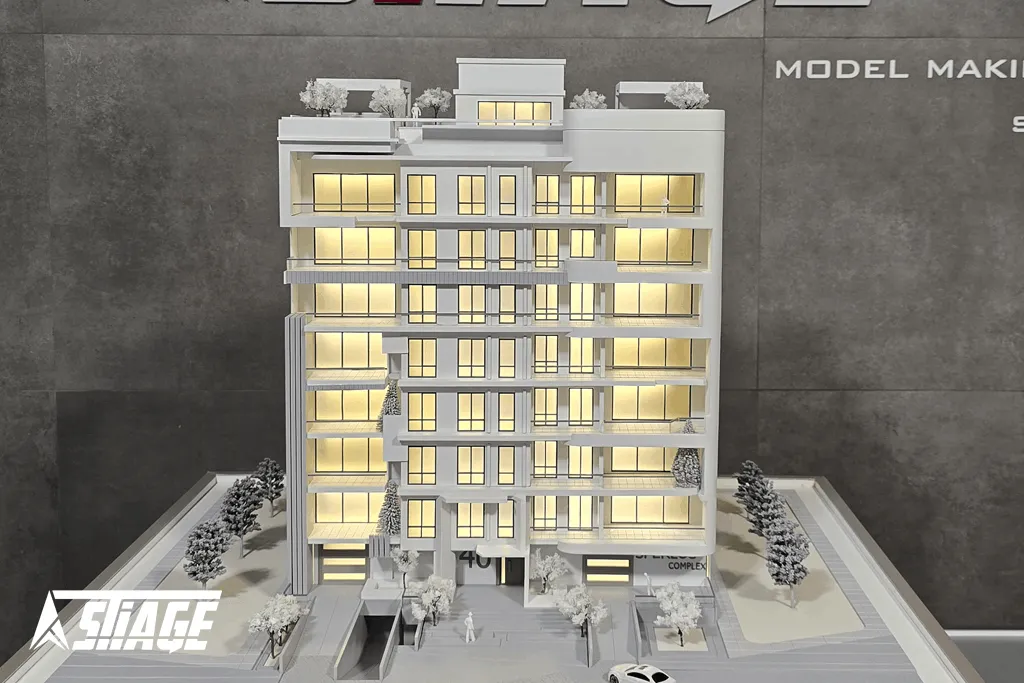
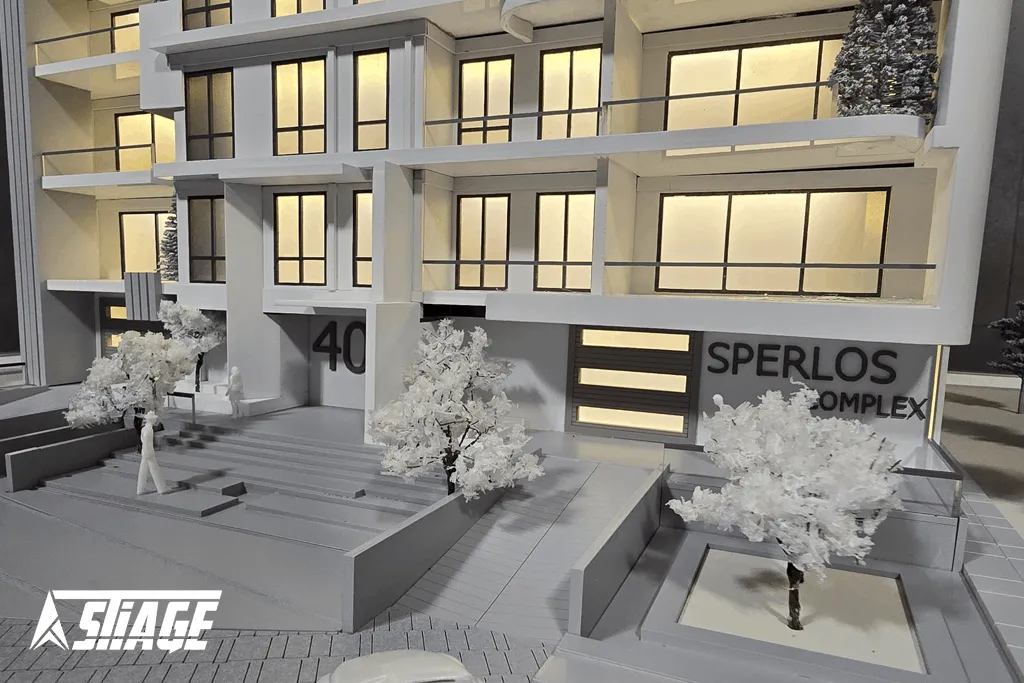
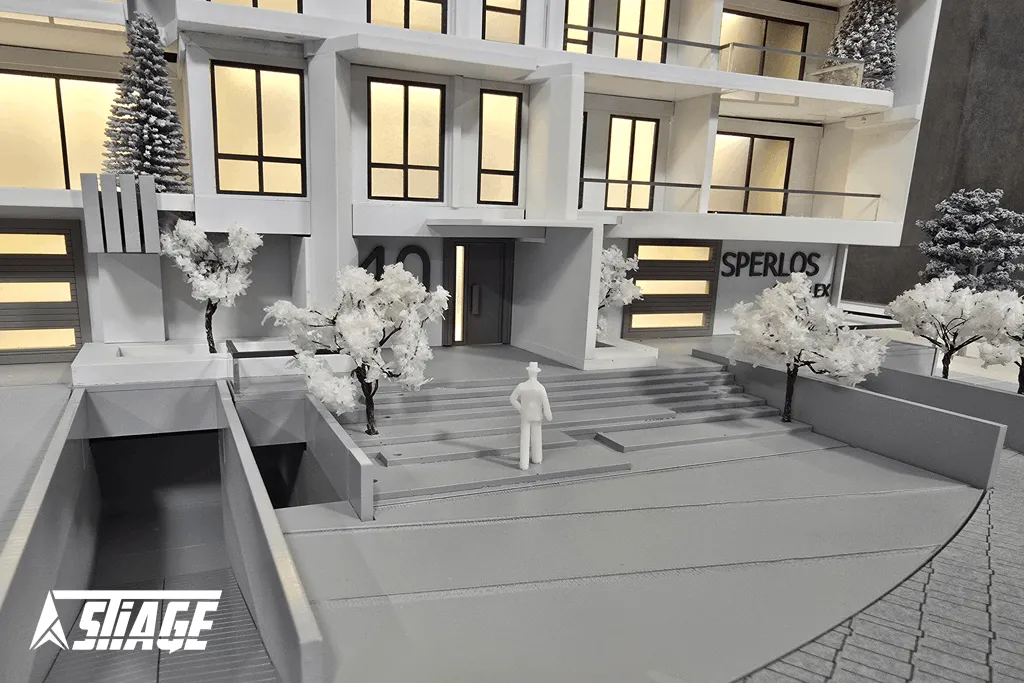
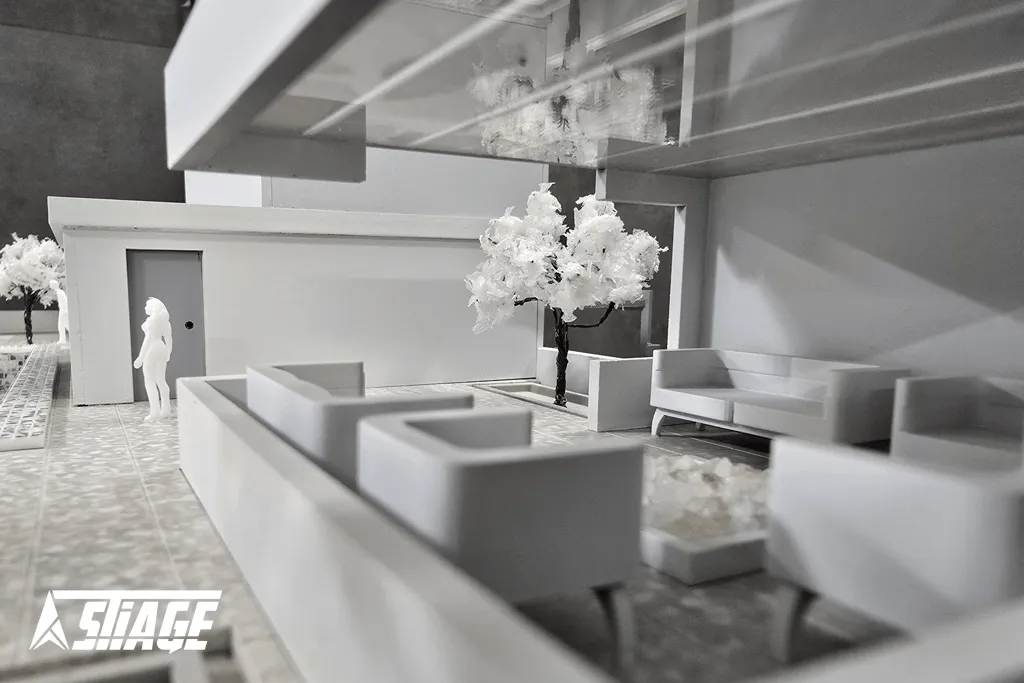
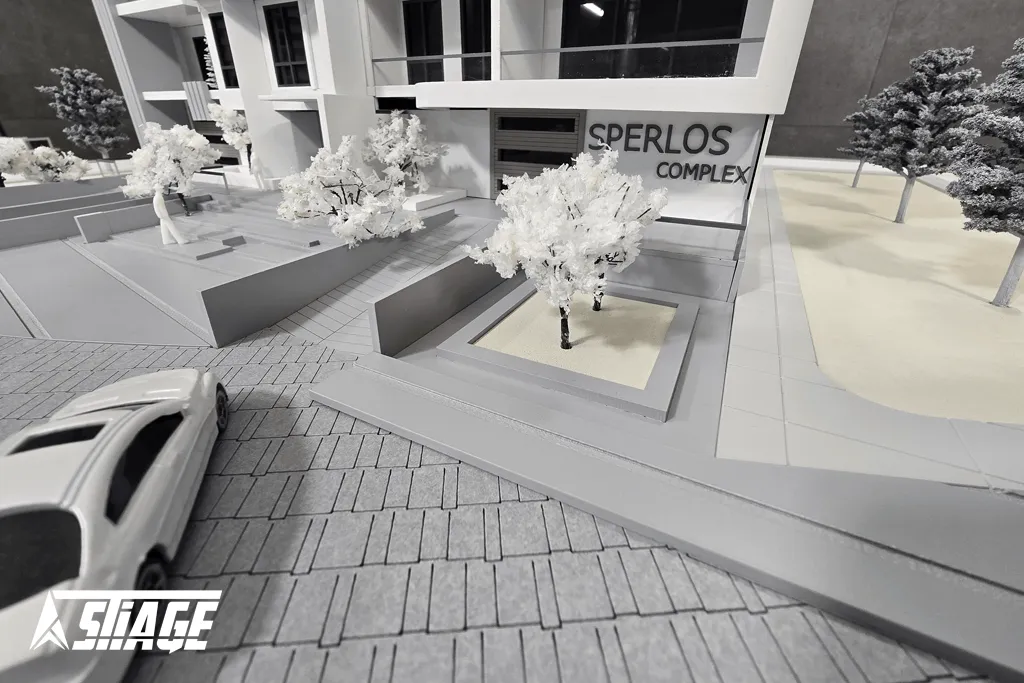
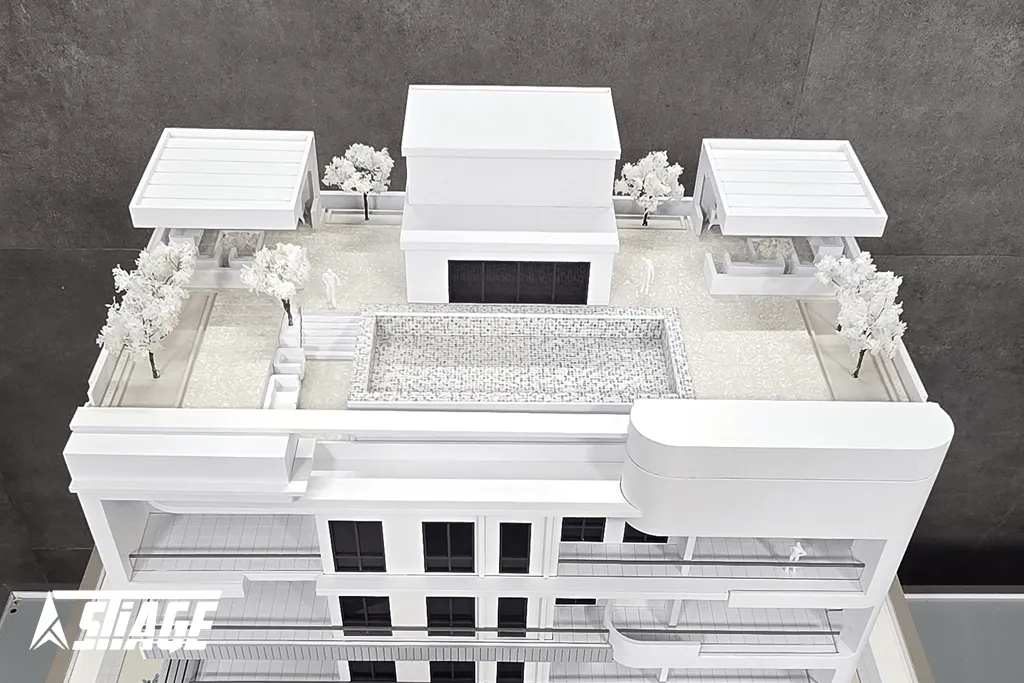
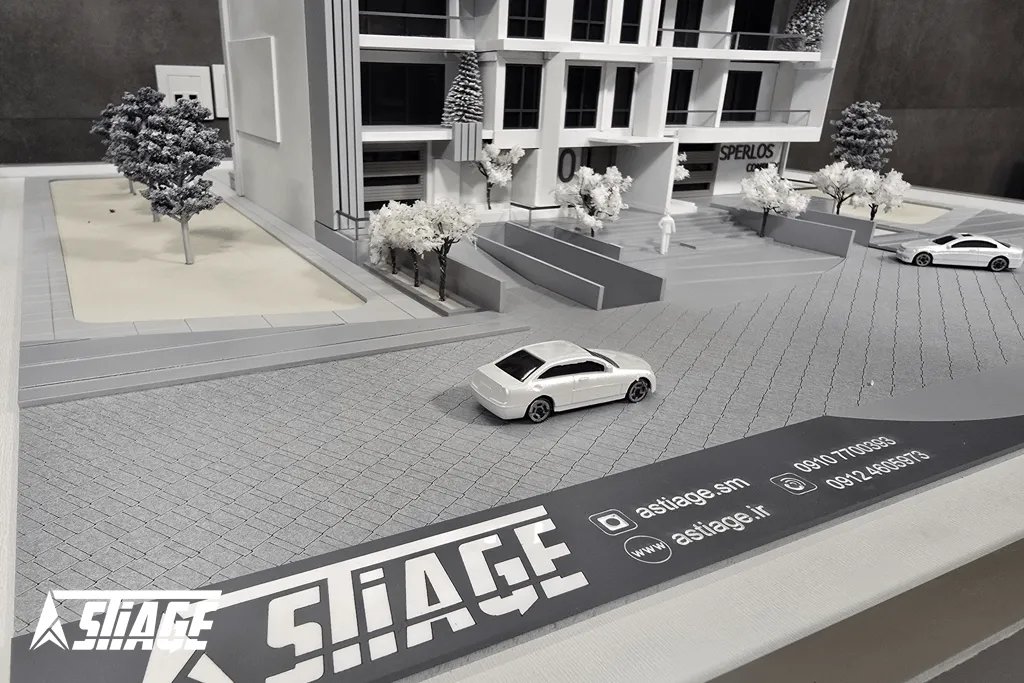
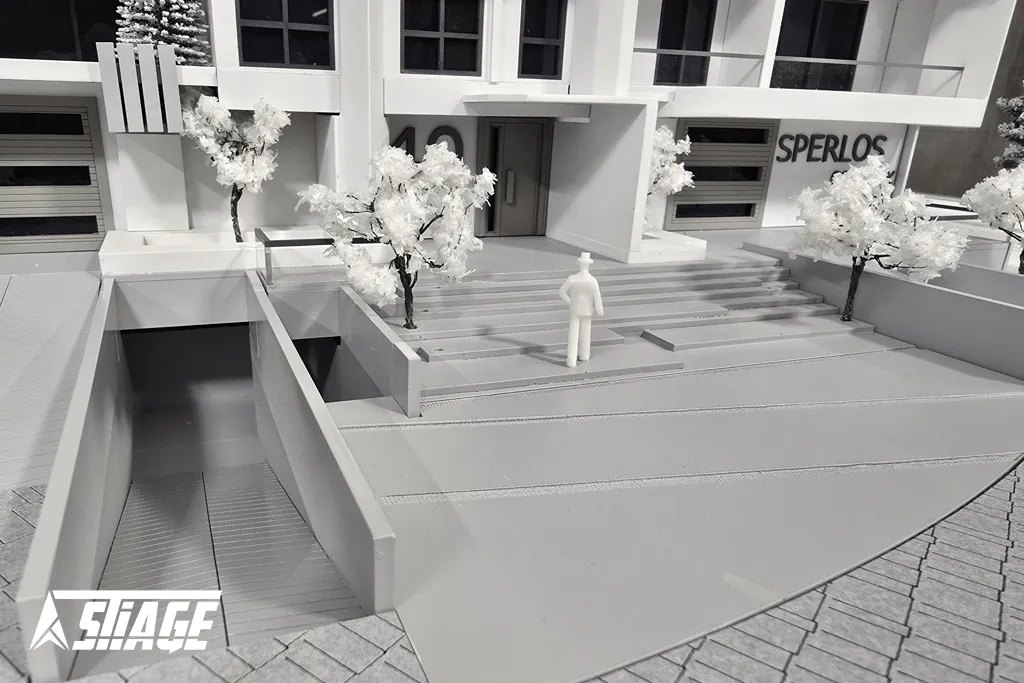
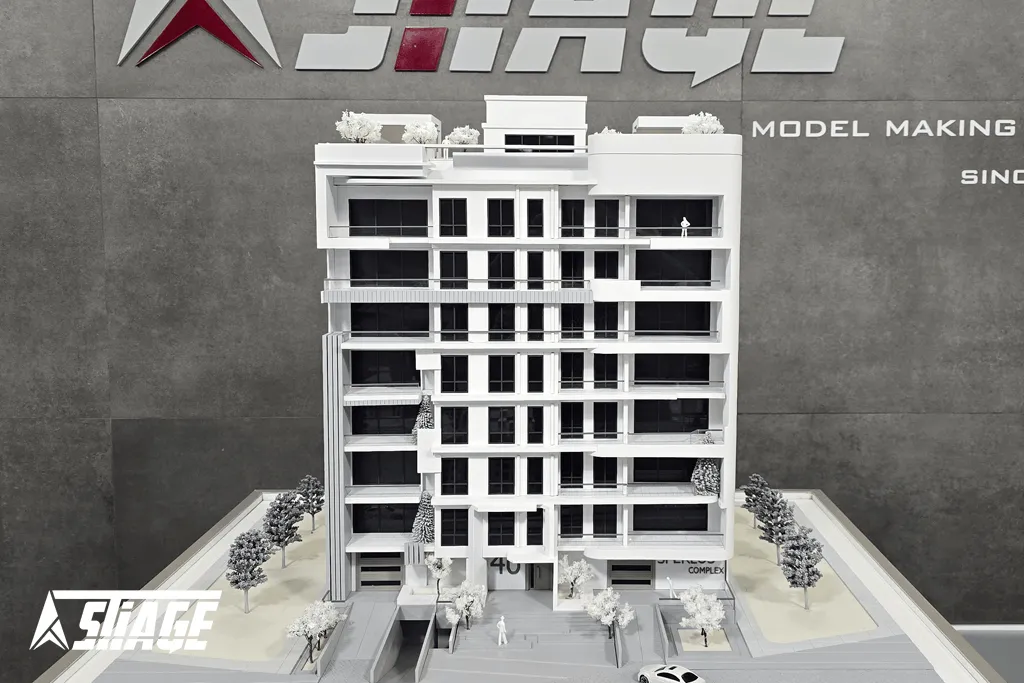
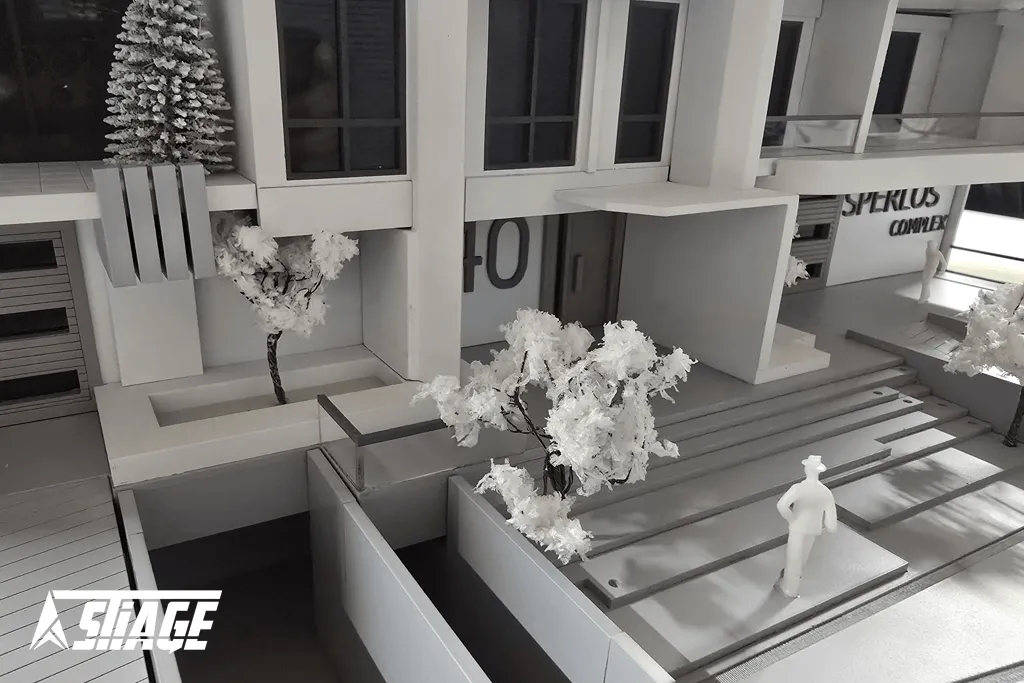
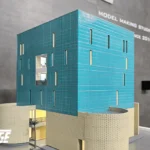
ماکت ساختمان اسپرلُس، یک نمونه دقیق و هنرمندانه از یک بنای معماری در مقیاس ۱:۷۵ است که با استفاده از پلکسی گلس و رنگ خودرو با سبک رنگآمیزی مونوکالر ساخته میشود. این ماکت بهویژه با نورپردازی طبقاتی خود، جلوهای حرفهای و واقعگرایانه به نمایش میگذارد. در ادامه، مراحل آمادهسازی این ماکت شرح داده میشود:
۱. انتخاب و برش متریال
در گام نخست، نقشههای معماری به مقیاس ۱:۷۵ تبدیل شده و بر اساس آن، قطعات ماکت با استفاده از دستگاه لیزر از متریال پلکسی گلس برش داده میشوند. دقت در این مرحله بسیار مهم است تا تمامی ابعاد و جزئیات بهدرستی مقیاسبندی و آماده شوند.
۲. مونتاژ بدنه ماکت
پس از برش، قطعات پلکسی با چسبهای مخصوص پلکسی گلس یا چسبهای شفاف صنعتی، بهصورت دقیق و تمیز به هم متصل میشوند. در این مرحله دقت در عمود بودن دیوارهها و تراز بودن سطوح اهمیت بالایی دارد.
۳. رنگآمیزی به سبک مونوکالر
برای رنگآمیزی، از رنگ خودرو استفاده میشود که سطحی یکنواخت، براق و با دوام ایجاد میکند. در سبک مونوکالر، تمام سطوح با یک رنگ یکدست پوشانده میشوند که جلوهای مینیمال و مدرن به ماکت میبخشد. رنگآمیزی در چند مرحله و با فاصله زمانی برای خشک شدن بهتر انجام میشود.
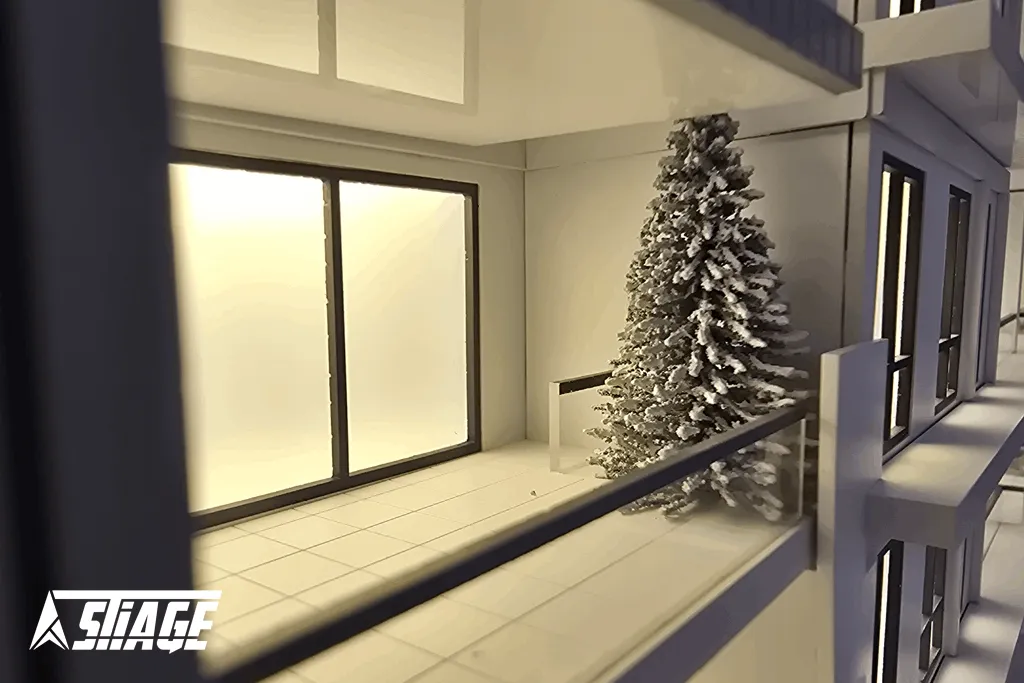
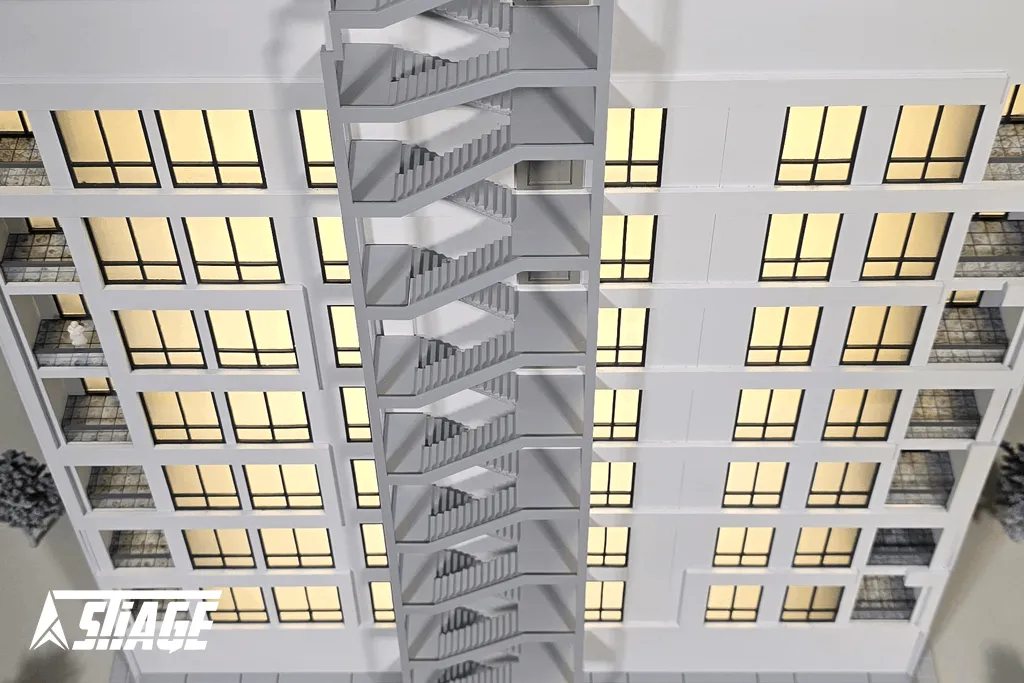
۴. اجرای نورپردازی طبقاتی
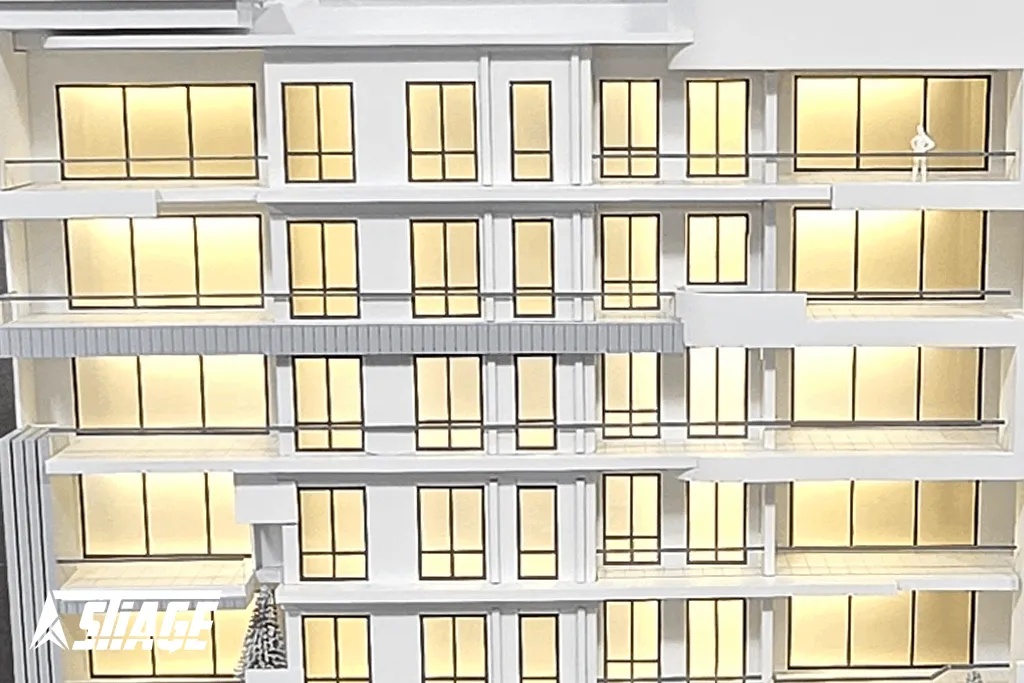
در این پروژه از نورپردازی طبقاتی استفاده شده است. در این نوع نورپردازی، نورها بهصورت مجزا روی سقف هر طبقه نصب میشوند تا روشنایی یکنواخت در کل ساختمان ایجاد شود. این روش نسبت به نورپردازی مرکزی طبیعیتر است، اما از نظر زمان و هزینه در سطح میانی قرار دارد: از نور نقطهای سادهتر و ارزانتر است، اما پیچیدهتر و پرهزینهتر از نورپردازی مرکزی.
۵. تست و تنظیم نور
در انتهای کار، نورپردازی بهصورت کامل تست میشود تا از پخش یکنواخت نور و عدم وجود نقاط تاریک اطمینان حاصل شود. همچنین مسیر سیمکشیها درون سازه مخفی شده تا ظاهری تمیز و حرفهای داشته باشد.
این ماکت به دلیل نورپردازی دقیق و طراحی یکدست، گزینهای بسیار مناسب برای نمایشگاههای معماری، ارائههای شرکتی و معرفی پروژههای ساختمانی است.
Esperlos Building Architectural Model
Scale: 1:75
Client: –
Material: Plexiglass
Painting: Automotive Paint
Painting Style: Monochrome
Category: Architectural Model
The Construction Process of the Esperlos Building Model at 1:75 Scale The Esperlos Building model is a precise and artistic representation of an architectural structure at a 1:75 scale, built using plexiglass and coated with automotive paint in a monochrome style. Its standout feature—layered lighting—adds a professional and realistic visual effect. Below is an outline of the key steps in the model’s preparation:
Material Selection and Cutting In the first step, architectural plans are scaled down to 1:75. Based on these, the model’s components are cut from plexiglass sheets using a laser cutting machine. Accuracy at this stage is crucial to ensure that all dimensions and details are precisely scaled and prepared.
Model Body Assembly After cutting, the plexiglass pieces are carefully assembled using specialized adhesives for plexiglass or clear industrial glues. Ensuring vertical alignment of walls and level surfaces is highly important in this stage for a clean and stable structure.
Monochrome Painting The model is painted using automotive paint, which provides a uniform, glossy, and durable surface. In the monochrome style, a single color is applied to all surfaces, giving the model a minimal and modern appearance. Painting is done in several stages with drying time between coats for best results.
Layered Lighting Installation This project uses layered lighting, where separate light sources are installed on the ceiling of each floor. This technique offers a uniform illumination throughout the building. It’s more natural than centralized lighting, and while it is more complex and costly than a single light point, it remains simpler and more affordable than full central lighting systems.
Lighting Test and Adjustment At the final stage, the lighting system is thoroughly tested to ensure even light distribution and eliminate dark spots. Wiring is hidden within the structure to maintain a clean and professional appearance.
Thanks to its detailed lighting and uniform design, this model is an excellent choice for architectural exhibitions, corporate presentations, and real estate project showcases.


")