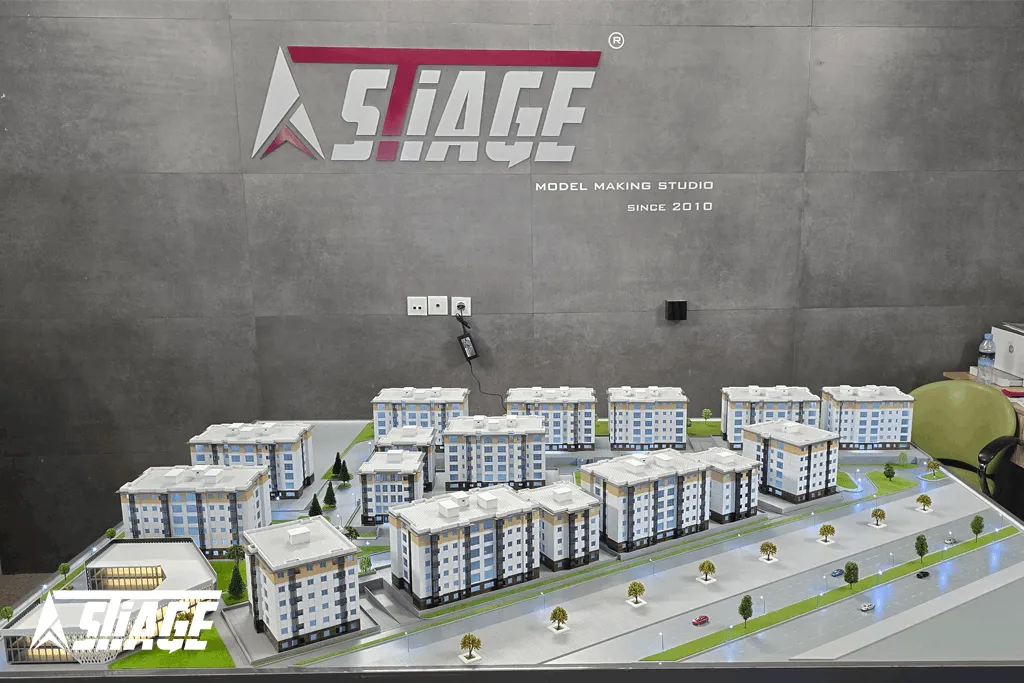
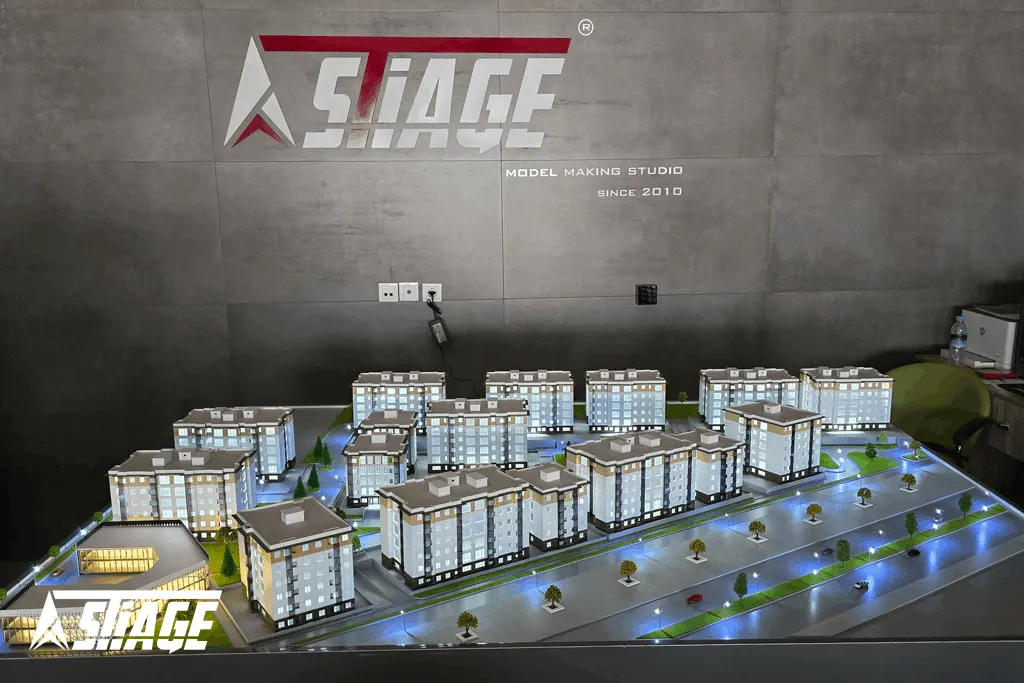
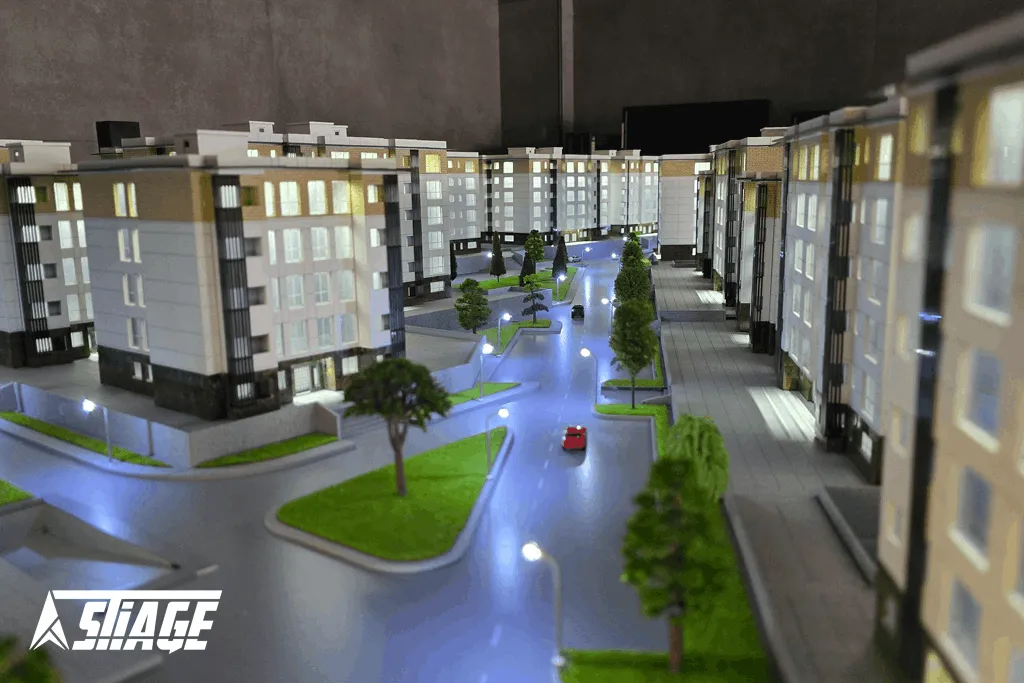
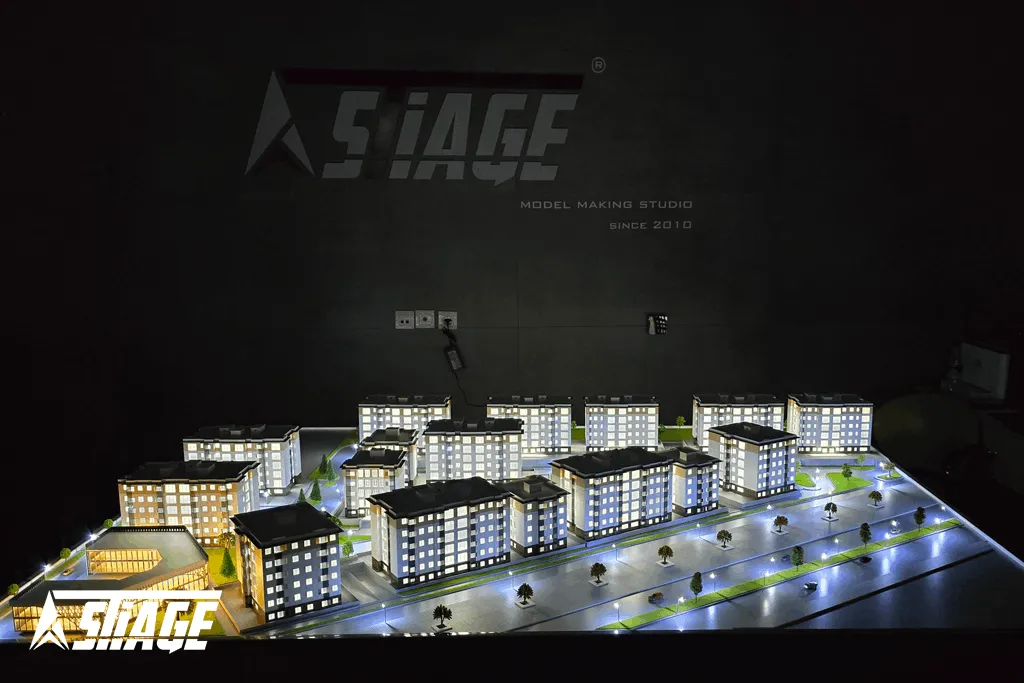
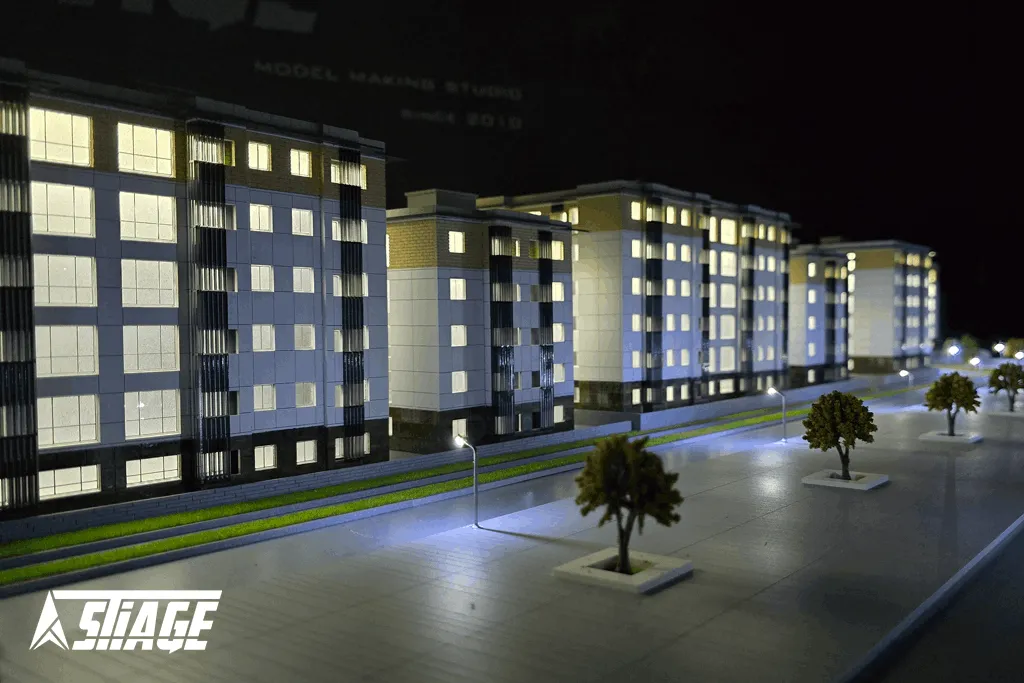
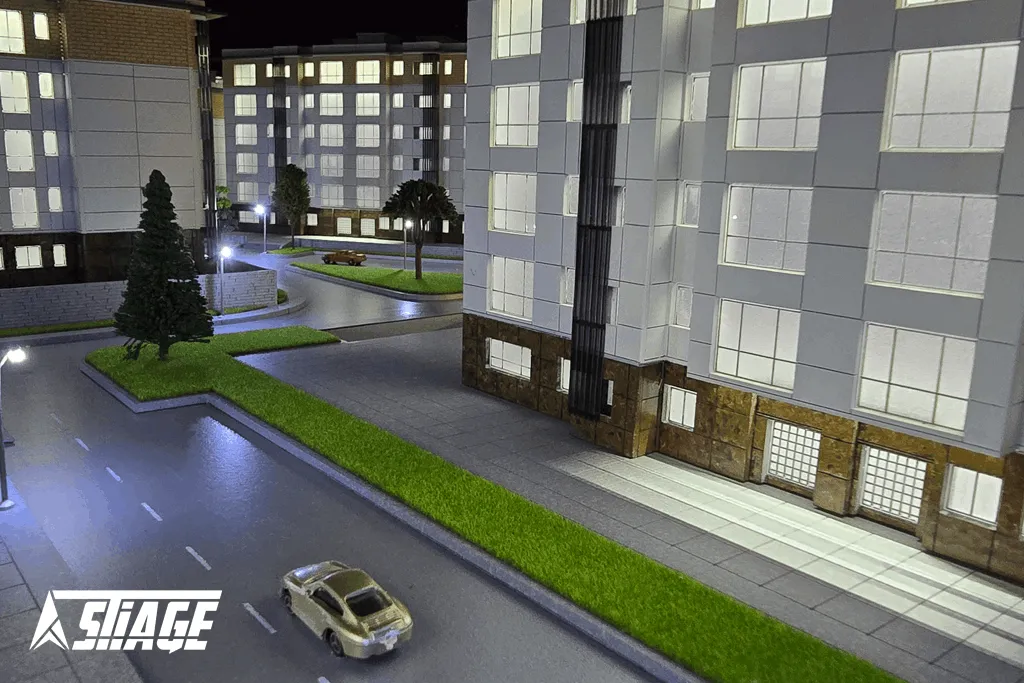
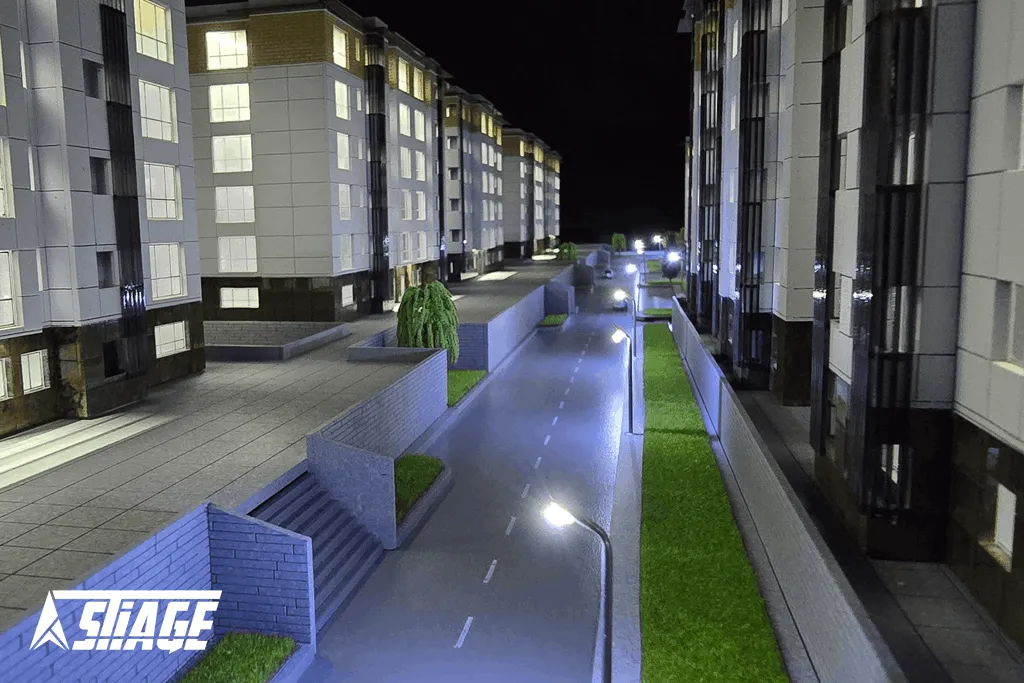
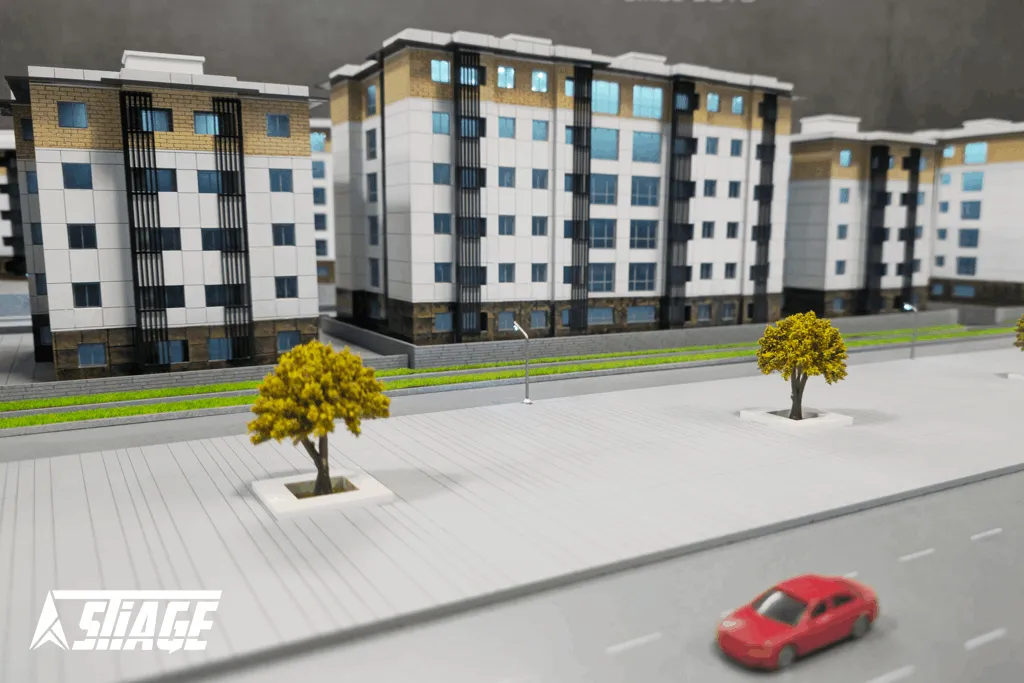
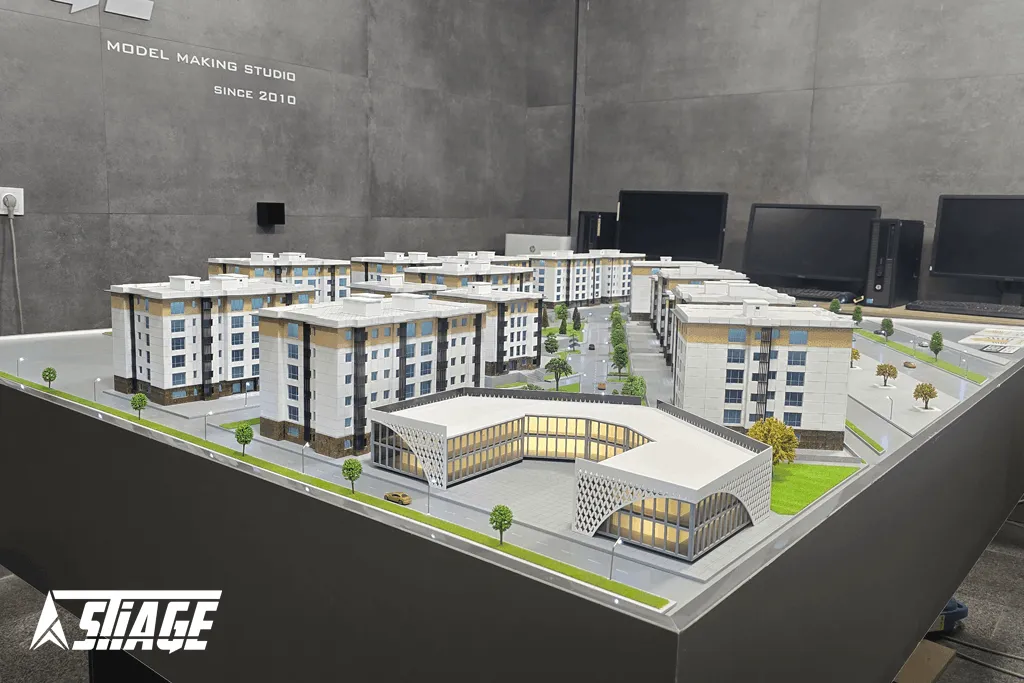
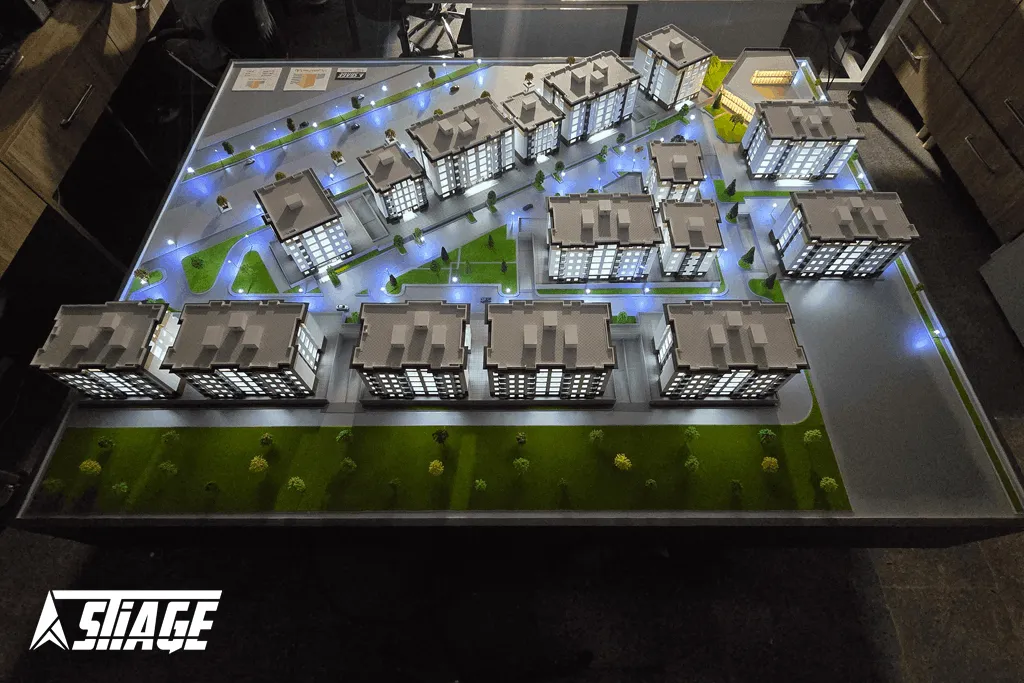
ماکت شهرک مسکونی گل مریم

شهرک مسکونی گل مریم
شهرک مسکونی گل مریم
شهرک مسکونی گل مریم
شهرک مسکونی گل مریم
مقیاس

1/150

کارفرما

متریال

پلکسی گلس

رنگ آمیزی

رنگ خودرو و رنگ اکریلیک

سبک رنگ آمیزی

رئال

دسته بندی

ماکت معماری

در این مقاله، فرآیند کلی تهیه‌ی ماکت شهرک مسکونی «گل مریم» در مقیاس ۱:۱۵۰ با استفاده از متریال پلکسی‌گلس، رنگ خودرو و اکریلیک به سبک رئال و با نورپردازی متمرکز بر ساختمان‌ها و محوطه تشریح می‌شود.

۱. تهیه نقشه‌ها و مستندات طراحی

برای شروع، پلان سایت شهرک، نماهای ساختمان‌ها و طرح محوطه شامل مسیرها، فضاهای سبز و پارکینگ با دقت توسط نرم‌افزار CAD (مثل AutoCAD یا Revit) یا به‌صورت دستی روی شیت‌های فنی آماده می‌شود. ابعاد هر بلوک مسکونی، فاصله بین آن‌ها و اندازه نهایی ماکت (مطابق مقیاس ۱:۱۵۰) در این مرحله تعیین می‌گردد.

۲. انتخاب ورق‌های پلکسی‌گلس و ضخامت مناسب

پلکسی‌گلس شفاف برای اجزای اصلی بنا (دیوارها و سقف‌ها) و پلکسی رنگی یا مات برای کف و نمای زمین انتخاب می‌شود. ضخامت معمول ۲–۳ میلی‌متر برای کف و دیواره‌ها و ۱–۲ میلی‌متر برای قطعات نماست. این تنوع ضخامت به افزایش جزئیات و سبک‌سازی وزن ماکت کمک می‌کند.

۳. برش دقیق با لیزر یا CNC

طرح پلان بر روی ورق‌های پلکسی کاملاً منطبق شده و با دستگاه لیزرکات یا CNC تمام خطوط برش (دیوارها، بازشوها، ستون‌ها) اجرا می‌شود. دقت بالا در این مرحله کلید حصول لبه‌های شفاف و بدون زدگی است. پس از برش، لبه‌ها با سمباده ۴۰۰–۶۰۰ صیقل داده می‌شوند تا زیبایی پلکسی حفظ شود.

۴. مونتاژ اولیه و تنظیم ساختار

قطعات برش‌خورده ابتدا بدون چسب سرهم (Dry Fit) می‌شوند تا از تطابق آن‌ها اطمینان حاصل شود. سپس با چسب متاکریلات دو جزئی قطعات به ترتیب نصب می‌شوند. استفاده از گیره‌های کوچک و شابلون‌های زاویه‌سنج، پیوستگی و راستای دقیق را تضمین می‌کند.

۵. رنگ‌آمیزی به سبک رئال

  • رنگ خودرو: برای نماهای بیرونی ساختمان‌ها استفاده می‌شود تا جلوه‌ای براق و واقعی ایجاد کند؛ این رنگ با پیستوله یا اسپری روی پلکسی اعمال و در کوره‌های کوچک دستی (یا اتاقک خشک‌کن خانگی) پخته می‌شود.

  • رنگ اکریلیک: برای کف‌ها، مسیرها و فضاهای سبز به‌صورت دستی با قلم‌مو یا اسپری پوشش داده می‌شود. استفاده از چند لایه رقیق‌شده رنگ اکریلیک، جلوه‌ای طبیعی و مات به محوطه می‌بخشد.

۶. نصب سیستم نورپردازی مرکزی

برای نورپردازی ساختمان‌ها و محوطه:

  1. طراحی مسیر کابل‌کشی زیر پایه ماکت در نظر گرفته می‌شود.

  2. چراغ‌های LED مینیاتوری (تک رنگ یا قابل تنظیم) در داخل سقف ساختمان‌ها جاسازی می‌شوند تا از پنجره‌ها نور بیرون زند.

  3. نورپردازی محوطه با مینیاتورهای چراغ خیابانی و دفنی، مسیرها و فضای سبز را روشن می‌کند.

  4. تمام کابل‌ها در کانال‌ زیرین پنهان شده و به یک منبع تغذیه مرکزی متصل می‌گردد.

۷. جزییات تکمیلی و ارائه نهایی

پس از تکمیل رنگ‌آمیزی و نورپردازی، جزئیاتی مانند مبلمان کوچک، درختچه‌های مدل (با موی فیبری یا اسفنج رنگ‌شده) و آدمک‌های مقیاس ۱:۱۵۰ اضافه می‌شوند. شاسی MDF یا پلکسی ضخیم‌تر به‌عنوان پایه، با برچسب «شهرک مسکونی گل مریم – مقیاس ۱:۱۵۰» تزئین می‌گردد. در نهایت، ماکت درون کابینت شیشه‌ای یا با کاور پلاستیکی محافظت می‌شود تا در نمایشگاه یا جلسه ارائه دوام بیشتری داشته باشد.
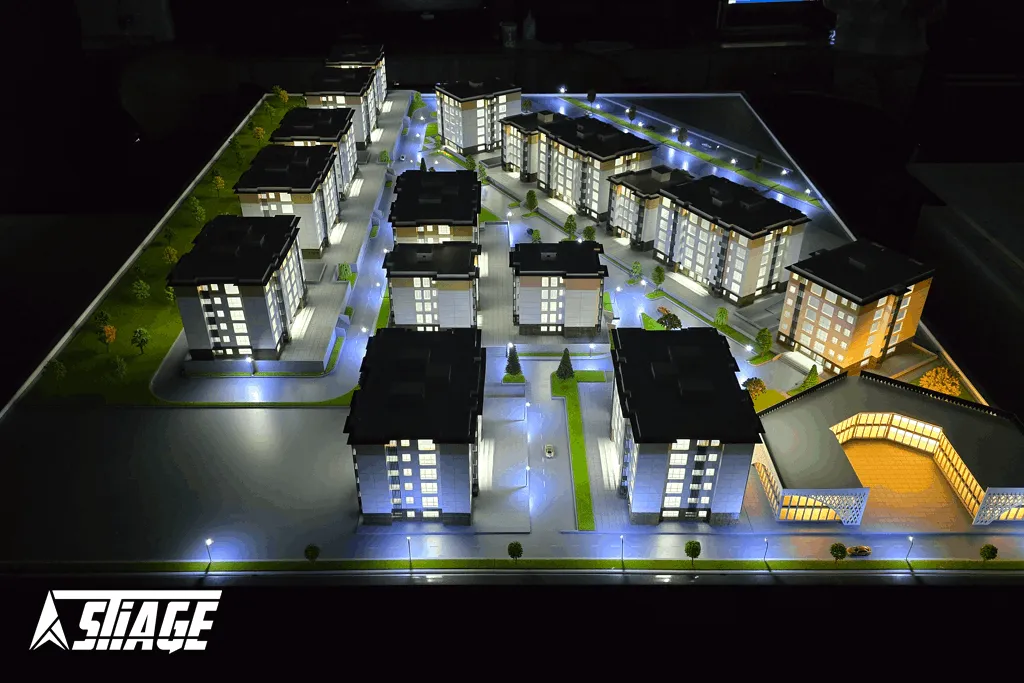
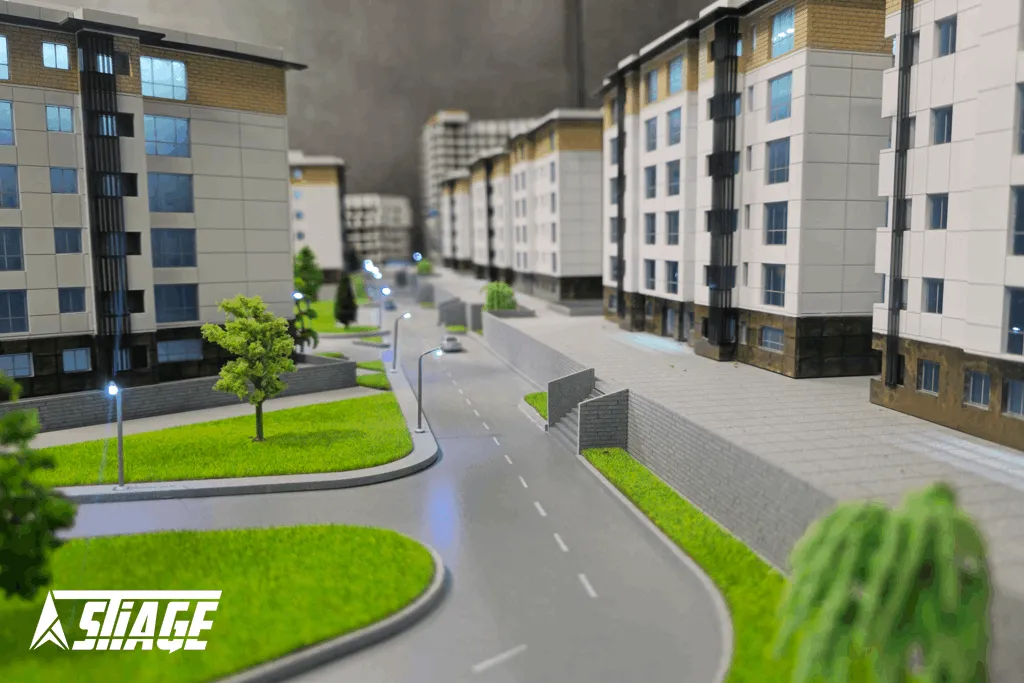
با تدارک دقیق نقشه‌ها، برش‌های حرفه‌ای، رنگ‌آمیزی رئال و نورپردازی متمرکز، ماکت شهرک گل مریم هم به‌صورت حرفه‌ای و هم از لحاظ بصری جذاب و آموزنده خواهد بود.

 
شهرک مسکونی گل مریم
شهرک مسکونی گل مریم
شهرک مسکونی گل مریم
شهرک مسکونی گل مریم
شهرک مسکونی گل مریم
شهرک مسکونی گل مریم
شهرک مسکونی گل مریم
شهرک مسکونی گل مریم
شهرک مسکونی گل مریم
شهرک مسکونی گل مریم
شهرک مسکونی گل مریم
شهرک مسکونی گل مریم
شهرک مسکونی گل مریم
شهرک مسکونی گل مریم
شهرک مسکونی گل مریم
شهرک مسکونی گل مریم
شهرک مسکونی گل مریم
شهرک مسکونی گل مریم
شهرک مسکونی گل مریم

Gol Maryam Residential Complex Model

  • Scale : 1/150
  • Client :
  • Materials : Plexiglass
  • Painting : Automotive paint and acrylic paint
  • Painting Style : Realistic
  • Category : Architectural Model

This article explains the overall process of creating the “Gol Maryam” residential complex model at a 1:150 scale using plexiglass, automotive paint, and acrylic paint in a realistic style, with focused lighting on the buildings and the surrounding area.

  1. Preparing Drawings and Design Documents
    To begin, the site plan of the residential complex, the facades of the buildings, and the layout of the surrounding area, including pathways, green spaces, and parking, are carefully prepared using CAD software (like AutoCAD or Revit) or manually on technical sheets. The dimensions of each residential block, the distance between them, and the final model size (according to the 1:150 scale) are determined in this step.
  2. Selecting Plexiglass Sheets and Appropriate Thickness
    Clear plexiglass is selected for the main building components (walls and roofs), and colored or matte plexiglass is chosen for the floors and ground surface. The typical thickness is 2–3 mm for floors and walls, and 1–2 mm for the facade components. This variation in thickness helps enhance detail and reduce the weight of the model.
  3. Precise Cutting with Laser or CNC
    The design plan is fully aligned on the plexiglass sheets, and all cut lines (walls, openings, columns) are executed using a laser cutter or CNC machine. High precision at this stage is crucial for achieving clean, smooth edges. After cutting, the edges are polished with sandpaper (400–600 grit) to maintain the plexiglass’s clarity and appearance.
  4. Initial Assembly and Structural Adjustment
    The cut pieces are initially assembled without adhesive (dry fit) to ensure they align properly. Then, the parts are glued in sequence using two-part acrylic adhesive. Small clamps and angle gauges are used to ensure proper alignment and accuracy.
  5. Realistic Painting
  • Automotive Paint: Applied to the building facades to create a glossy, realistic appearance. This paint is sprayed or applied with a gun and then baked in small ovens (or home drying cabinets).
  • Acrylic Paint: Applied to floors, pathways, and green areas using brushes or spray. Multiple layers of thinned acrylic paint are used to give a natural, matte finish to the surroundings.
  1. Installing Central Lighting System
    For lighting the buildings and surrounding areas:
  • A cable routing path under the model’s base is designed.
  • Miniature LED lights (single color or adjustable) are embedded inside the building roofs to illuminate through the windows.
  • The surrounding area is lit with miniature streetlights and buried lights, illuminating the pathways and green spaces.
  • All cables are hidden in an under-model channel and connected to a central power source.
  1. Final Details and Presentation
    After completing the painting and lighting, additional details such as small furniture, model shrubs (made with fibrous hair or colored foam), and 1:150 scale people are added. An MDF or thicker plexiglass base is used to support the model, and a label reading “Gol Maryam Residential Complex – Scale 1:150” is attached. Finally, the model is protected in a glass cabinet or with a plastic cover to ensure durability during exhibitions or presentations.

With carefully prepared drawings, professional cutting, realistic painting, and focused lighting, the Gol Maryam residential complex model will be both visually attractive and informative.