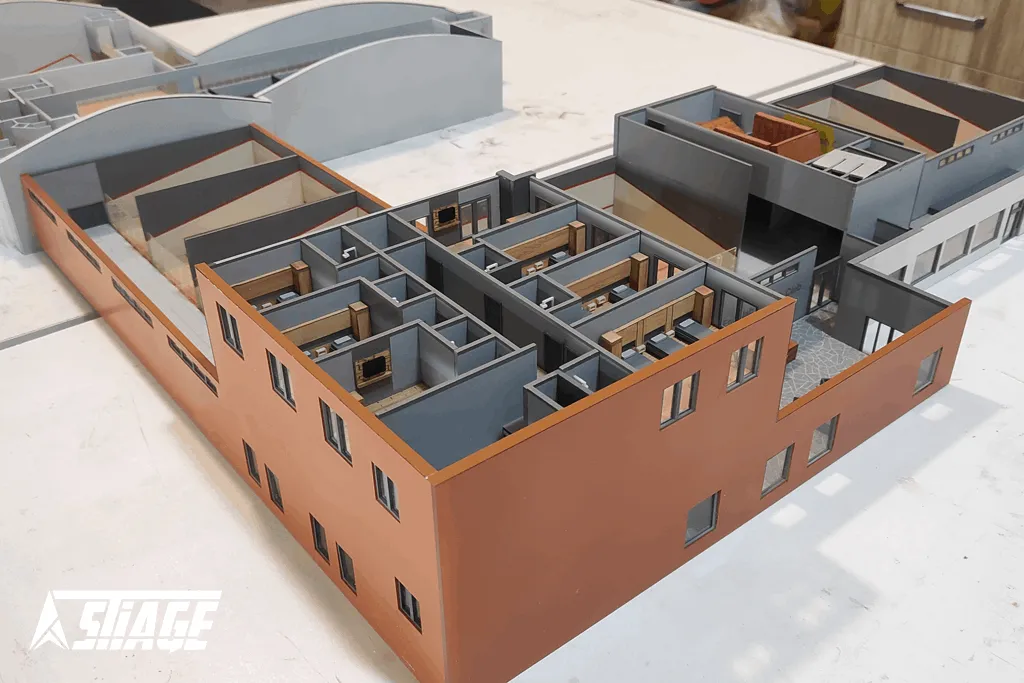
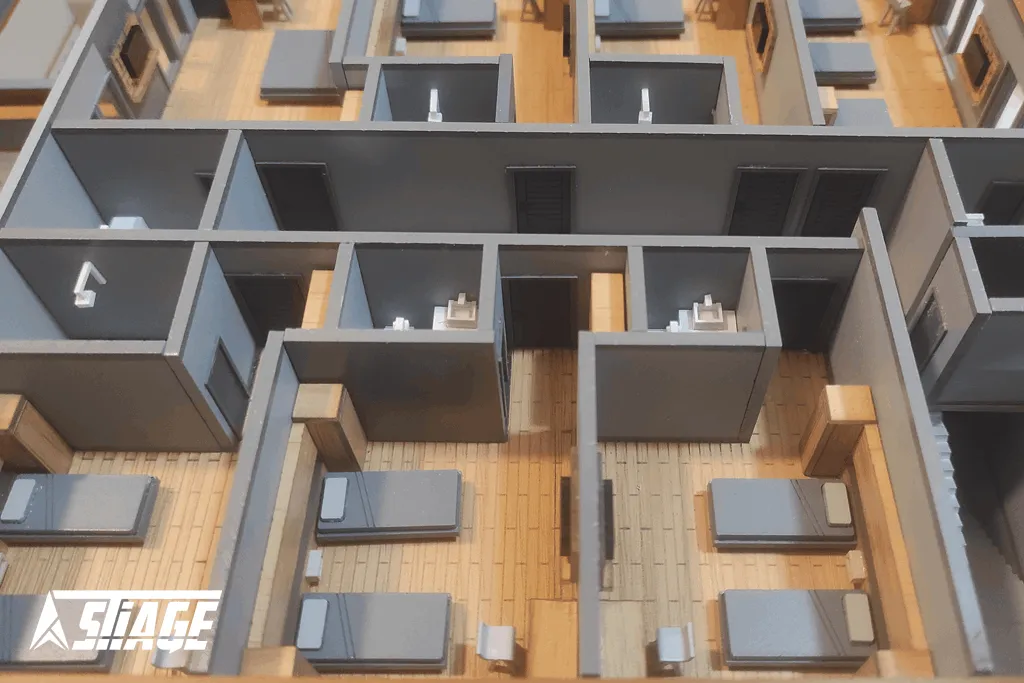
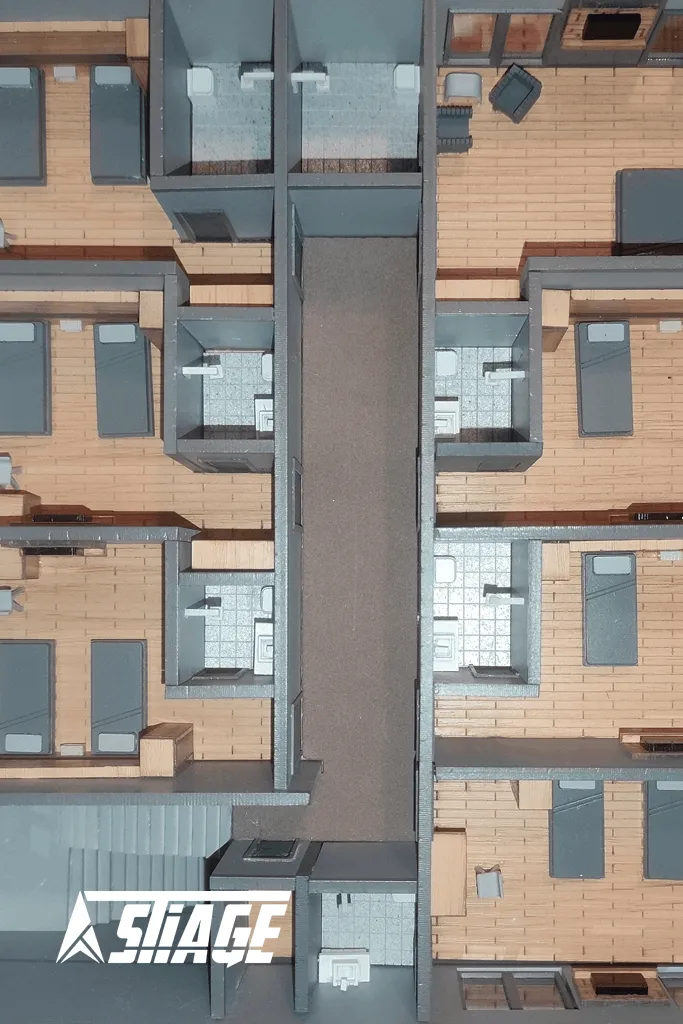
ماکت سکشن برای نمایش و درک بهتر پلان ساختمان ، چیدمان دکوراسیون داخلی ، متریال ساخت ، لایه های زمین ، جزئیات دستگاه ها و موتور … و در کل هر چیزی که جزئیات پیچیده و غیر قابل توصیف دارد ، ساخته میشود. برای مثال در ماکتهای معماری ، ما یک طبقه از ساختمان را بدون سقف میسازیم و تمام چیدمان ، دیوارها ، ستون گذاری و … قابل رویت و درک میشوند و تیم طراحی با جابجایی مبلمان میتواند درک بهتری از فضا داشته باشد . برای ماکتهای صنعتی و آموزشی ، ما ماکت (مثلا ) موتور یک جت را با یک برش افقی یا عمودی میسازیم و تمامی لایه ها و اجزا و قطعات به کار رفته در موتور نمایش داده میشوند.
در ادامه به بررسی مراحل مختلف ساخت یک ماکت معماری بر پایه پلان مقطع افقی با مقیاس ۱:۷۵ و با استفاده از پلکسیگلس و رنگ رزینی میپردازیم.
1. اهمیت انتخاب متریال و مقیاس مناسب
ماکتهای معماری بهعنوان یکی از ابزارهای اصلی در انتقال ایدههای طراحی شناخته میشوند و پلکسیگلس با شفافیت بالا و وزن کم، یکی از محبوبترین متریالها در این حوزه است. مقیاس ۱:۷۵ نیز تعادلی مطلوب میان جزئیات و راحتی اجرا ایجاد میکند؛ این نسبت امکان نمایش دقیق دیوارهها و مبلمان را فراهم کرده و در عین حال پیچیدگی و هزینهی تولید را کنترل میکند.
2. طراحی و آمادهسازی نقشه پلان
در گام نخست، پلان افقی ساختمان با دقت در نرمافزارهای CAD یا روی شیت چاپ میشود. این مرحله اهمیت زیادی دارد زیرا اندازهگیریها و جزئیات فنی مستقیماً به کیفیت نهایی ماکت اثر میگذارند. وضوح خطوط نمایانی چون دیوارهها، بازشوها و ستونها در این مرحله پایه و اساس برشهای بعدی خواهد بود.
3. برش پلکسیگلس با فناوریهای نوین
پلکسیگلس معمولاً در ضخامتهای ۱ تا ۳ میلیمتر برای اجزای دیواره و کف انتخاب میشود. برش دقیق این قطعات به کمک دستگاههای CNC یا لیزرکات انجام میگیرد تا لبههایی صاف و بدون نقص حاصل شود. پس از برش، لبهها با سنبادهی میکرونی صیقل داده میشوند تا شفافیت و زیبایی ظاهری حفظ گردد.
4. مونتاژ و چسبکاری اجزا
پس از آماده شدن قطعات پلکسی، آنها ابتدا بهصورت آزمایشی کنار هم چیده میشوند تا انطباق آنها بررسی شود؛ این رویکرد باعث کاهش خطاهای احتمالی میشود. چسب متاکریلات، بهعنوان چسب تخصصی پلکسی، برای اتصال قطعات به کار میرود و زاویههای ۹۰ درجه توسط نگهدارندههای موقت ثابت میمانند تا پیوندها استحکام کافی پیدا کنند.
5. پوشش نهایی با رنگ رزینی
رنگ رزینی در دو نوع اپوکسی و اکریلیک موجود است که هر یک ویژگیهای خاص خود را دارد. ویژگی برجستهی این پوشش، ایجاد لایهای مقاوم، براق و یکنواخت است که علاوه بر زیبایی، از لایههای پلکسی در برابر خط و خش محافظت میکند. استفاده از رنگدانههای پودری در رزین، تنوع رنگی بالایی میآفریند و امکان چند مرحله رنگآمیزی برای دستیابی به پوشش ایدهآل فراهم میشود.
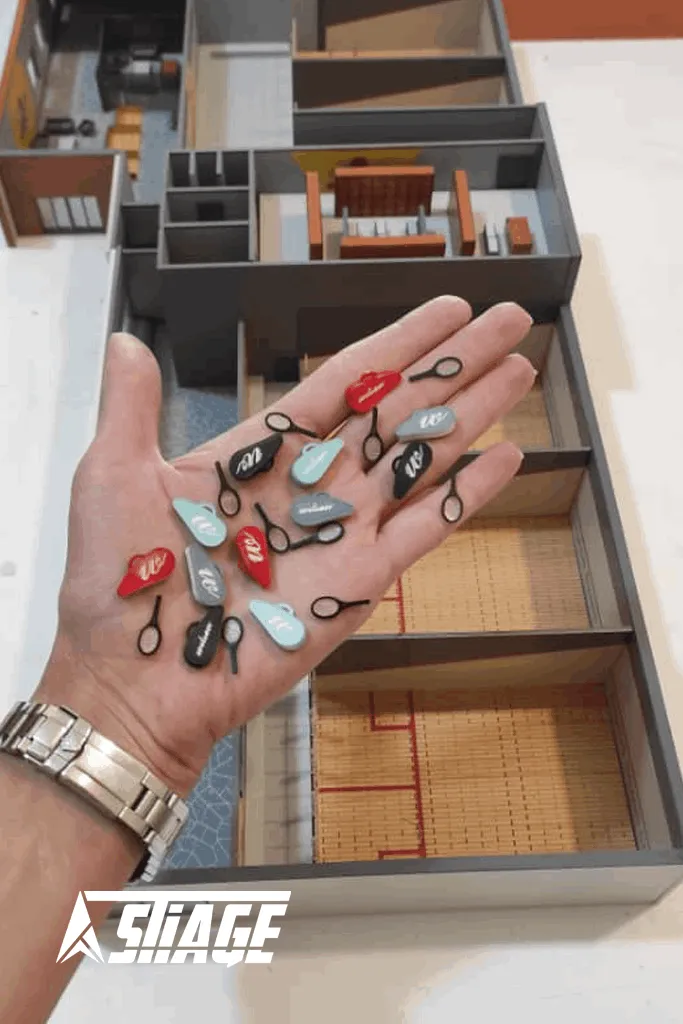
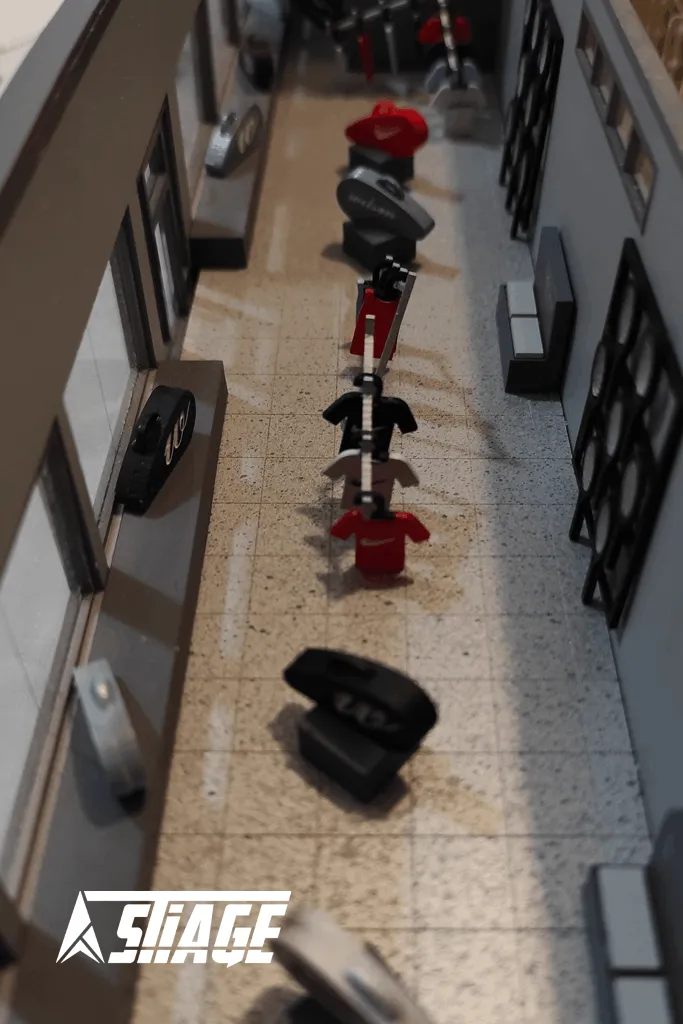
5. افزودن جزئیات معماری و مبلمان
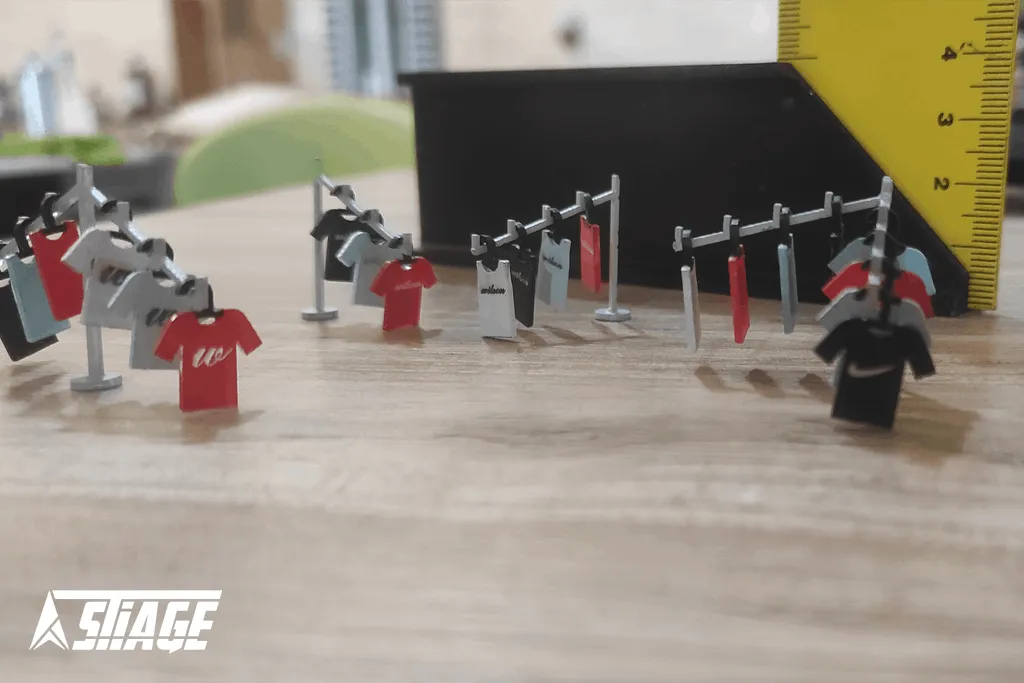
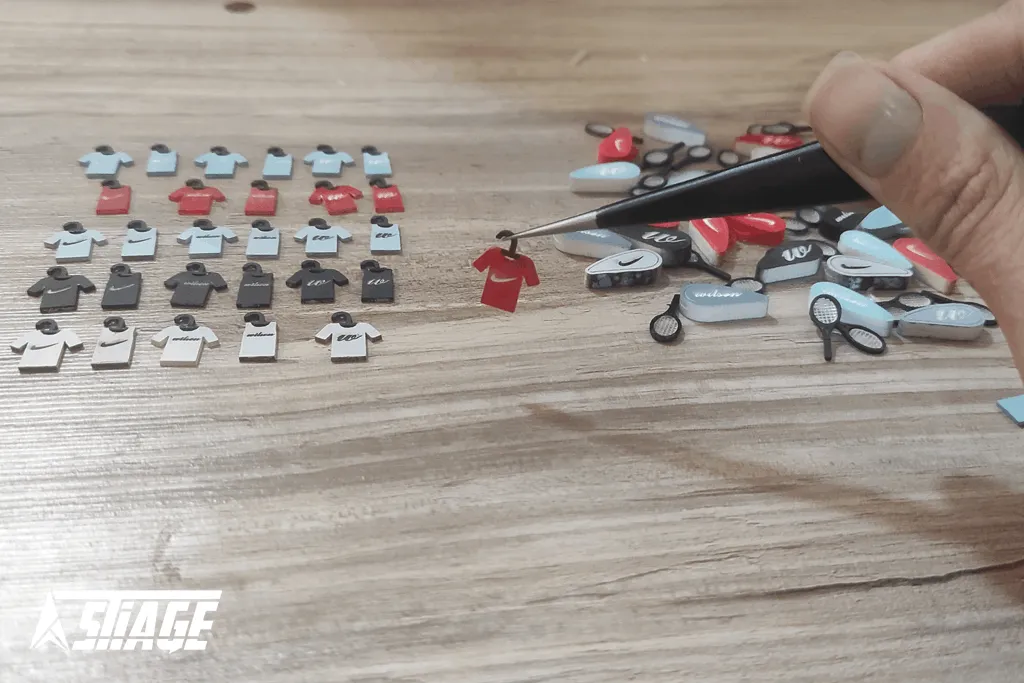
برای تکمیل نما و القای حس مقیاس، جزئیاتی مثل مبلمان و عناصر داخلی با مواد کمضخامت (نظیر کاغذ ضخیم یا پلکسیرنگی) تهیه میشوند. این عناصر کوچک، در کنار سازهی اصلی، نقش مهمی در فهم بهتر طرح و فضاهای داخلی ایفا میکنند.
5. ارزیابی نهایی و نکات حمل و نقل
در پایان، ماکت از نظر همترازی سطوح و یکنواختی رنگ مورد بازبینی قرار میگیرد. بستهبندی مناسب با فوم ضربهگیر برای حمل و نقل، عمر ماکت را افزایش میدهد و از آسیبهای احتمالی جلوگیری میکند.
با تکیه بر این چارچوب مفهومی، میتوان تصویری کلی از فرآیند ساخت ماکت معماری در مقیاس ۱:۷۵ به دست آورد؛ روشی که ترکیب متریالهای شفاف و رنگهای رزینی، امکان ارائهی طرحها را بهصورت جذاب و حرفهای فراهم میآورد.
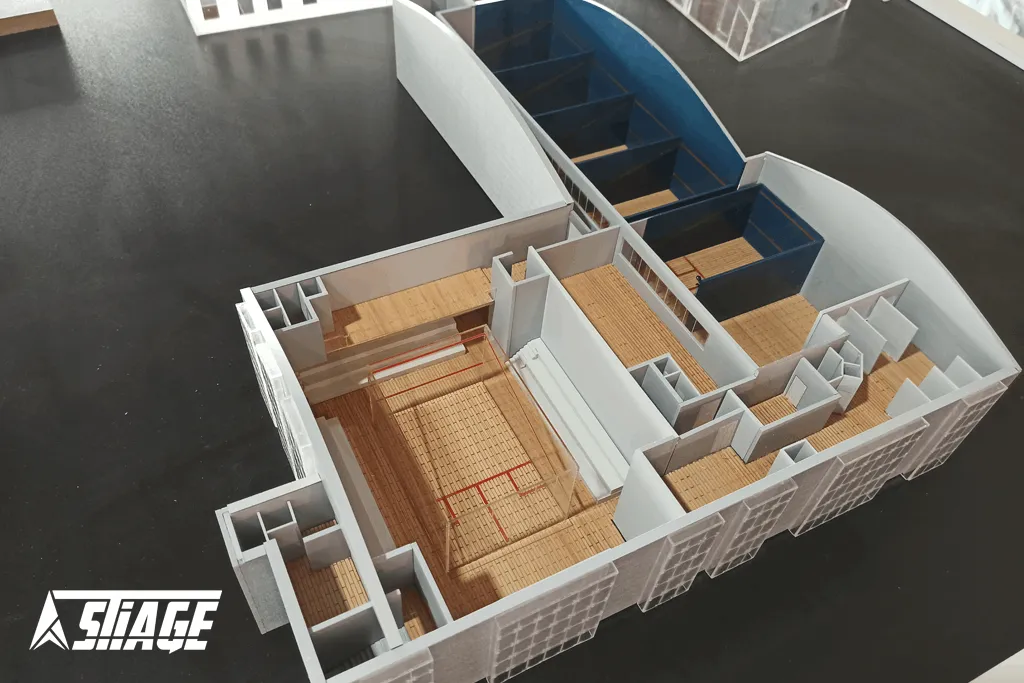
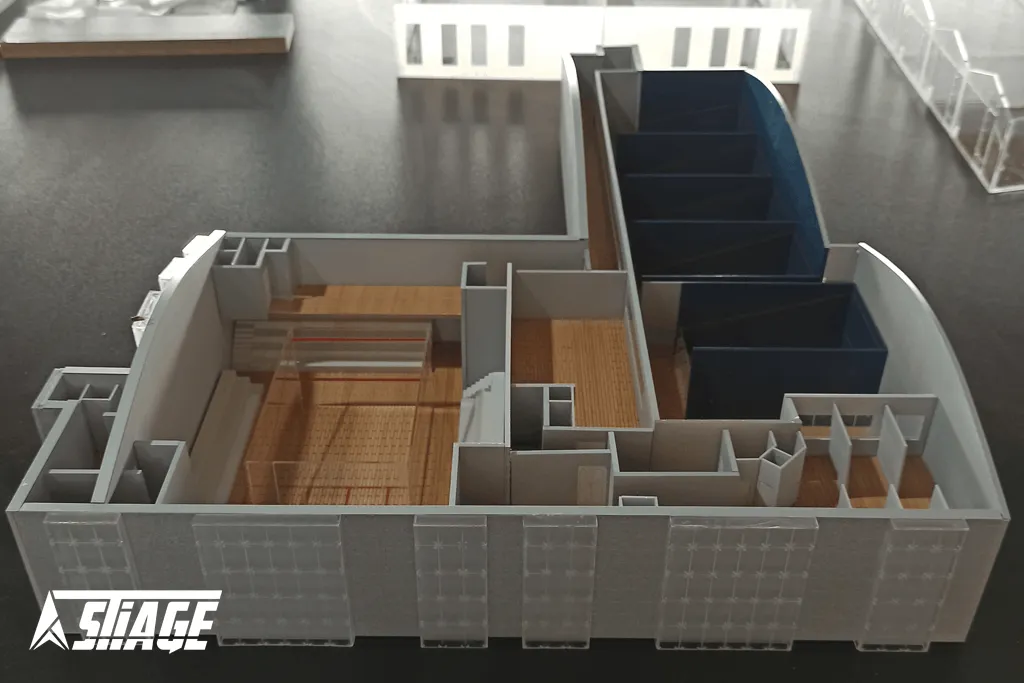
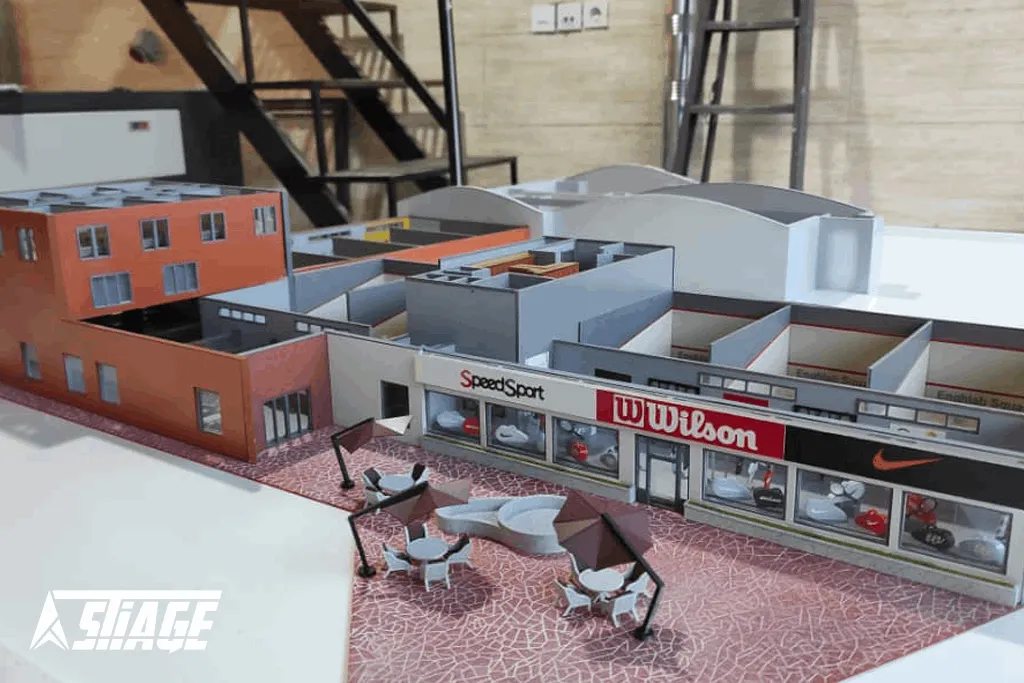
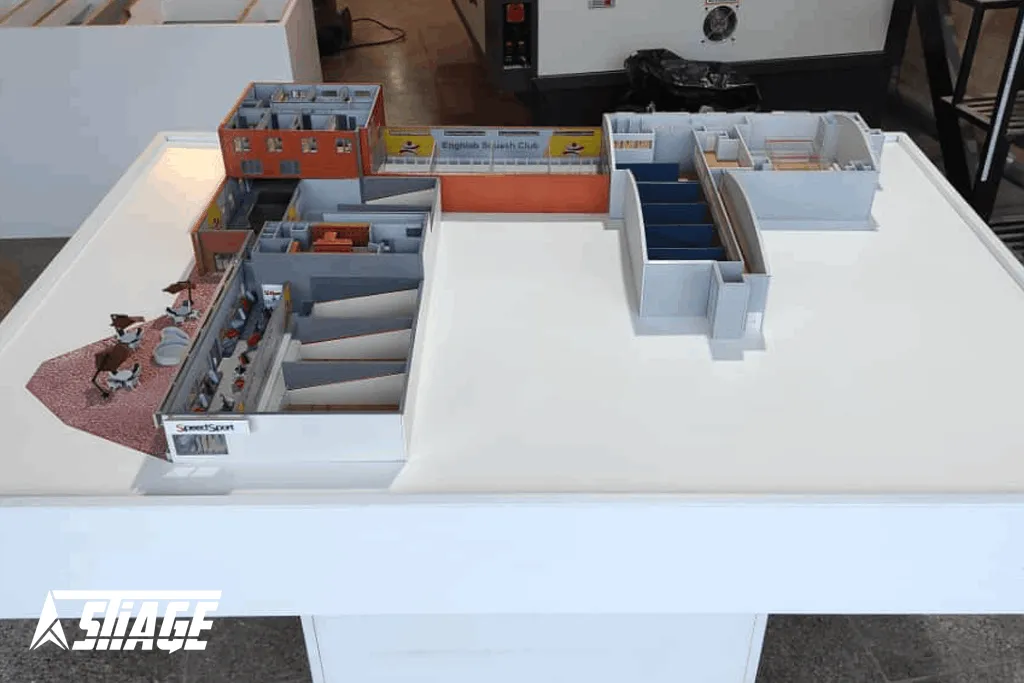
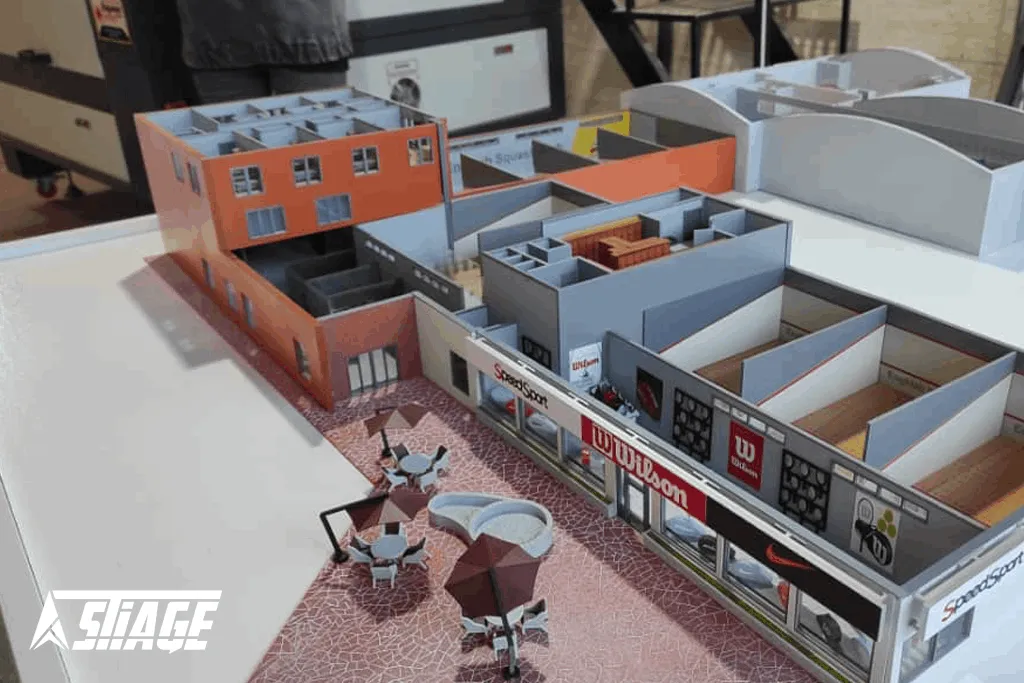
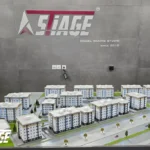
Model of the Squash Hall Section at Enqelab Sports Complex
Scale : 1/75
Client : –
Material : Plexiglass
Painting : Resin Paint
Category : Architectural Model
In this article, we discuss the general process of creating an architectural model for a building section, designed to enhance the understanding of floor plans, interior design arrangement, construction materials, land layers, device details, engines, and anything with intricate details that cannot easily be described. For example, in architectural models, we may create a floor of a building without the ceiling, allowing all elements such as wall arrangements, columns, etc., to be visible and comprehensible, thus providing a better spatial understanding for the design team through furniture adjustments. In industrial and educational models, we might create a model of, say, a jet engine with a horizontal or vertical cut, showing all the layers, components, and parts used in the engine.
Now, let’s take a closer look at the different stages of creating an architectural model based on a horizontal section plan with a scale of 1:75 using plexiglass and resin paint.
Importance of Choosing the Right Material and Scale Architectural models are one of the primary tools for conveying design ideas, and plexiglass, due to its high transparency and light weight, is one of the most popular materials in this field. The scale of 1:75 strikes a good balance between detail and ease of execution; this ratio allows for the accurate depiction of walls and furniture while keeping the complexity and production cost under control.
Designing and Preparing the Plan Drawings The first step is to carefully create the horizontal building plan using CAD software or print it onto technical sheets. This stage is crucial because the measurements and technical details directly impact the final quality of the model. The clarity of lines such as walls, openings, and columns will form the foundation for the subsequent cuts.
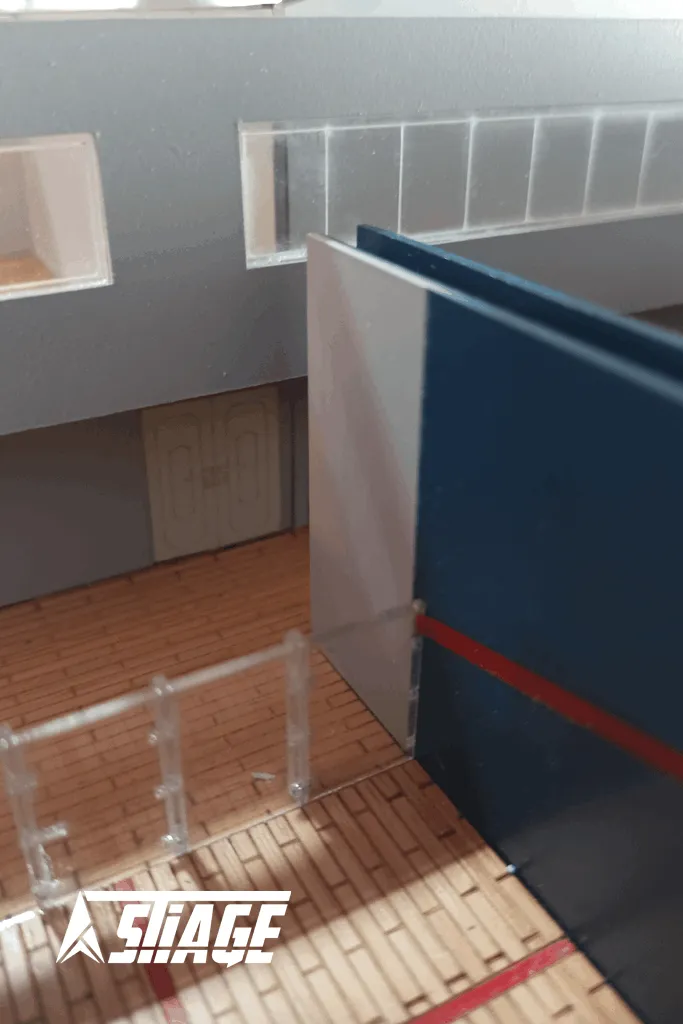
Cutting Plexiglass with Advanced Technology Plexiglass is typically chosen in thicknesses ranging from 1 to 3 millimeters for wall and floor components. The precise cutting of these pieces is carried out using CNC machines or laser cutters to ensure smooth, flawless edges. After cutting, the edges are polished with fine sandpaper to preserve the transparency and aesthetic appearance of the plexiglass.
Assembly and Gluing of Parts Once the plexiglass pieces are ready, they are first assembled without glue (Dry Fit) to check for alignment. This approach helps minimize potential errors. Methyl methacrylate adhesive, which is specifically designed for plexiglass, is used to bond the pieces, and temporary holders ensure that the 90-degree angles are maintained during the gluing process.
Final Coating with Resin Paint Resin paint, available in epoxy and acrylic types, is used to provide a durable, glossy, and uniform coating. This coating not only enhances the aesthetic but also protects the plexiglass from scratches. The use of powdered pigments in the resin allows for a wide range of color options, and multiple layers of paint can be applied to achieve the ideal finish.
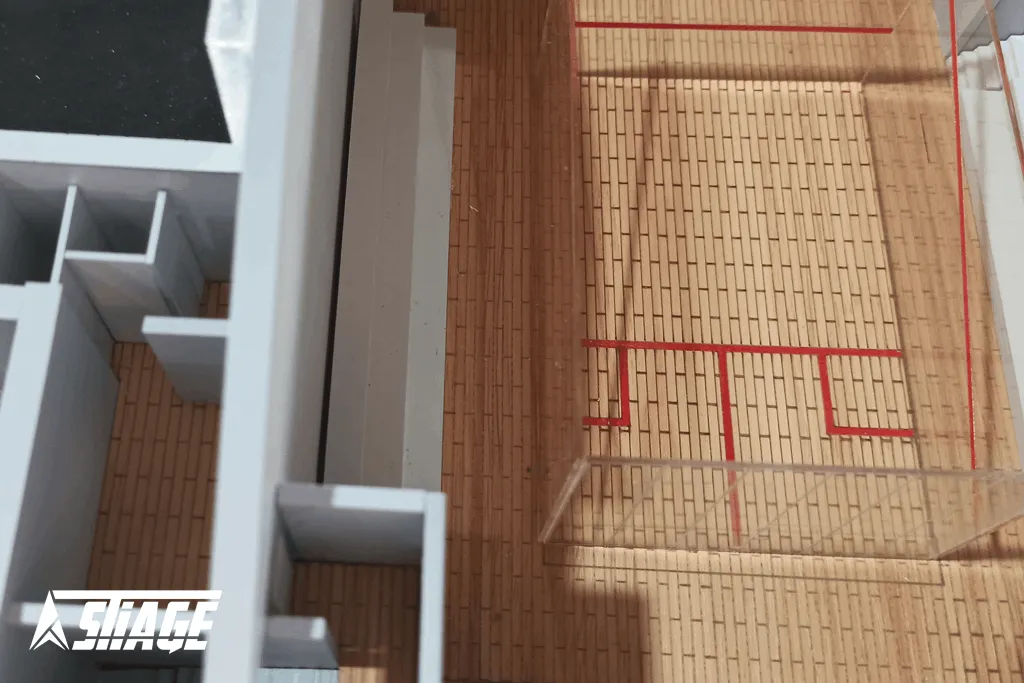
Adding Architectural Details and Furniture To complete the model and convey a sense of scale, details such as furniture and internal elements are created using thin materials (like thick paper or colored plexiglass). These small elements, alongside the main structure, play a key role in better understanding the design and internal spaces.
Final Evaluation and Transport Considerations At the end, the model is evaluated for level alignment and uniformity of color. Proper packaging with impact-absorbing foam is essential for transport to extend the model’s lifespan and prevent potential damage.
By following this conceptual framework, we can understand the process of building an architectural model at a 1:75 scale, a method that combines transparent materials and resin paints to present designs in an attractive and professional manner.